
Go to documentation repository


You can configure the doors of the C3 and InBio controllers on the settings panel of the ZK C3 door and ZK INBIO door objects that are created on the basis of the corresponding ZK С3 controller and ZK INBIO controller objects.
Note
Configuration of the door will be considered on the example of the door of the ZK Teco InBio controller. You can configure the doors of the C3 controller in the same way.
To configure the ZK Teco door, do the following:
- Go to the setting panel of the object that corresponds to the required ZK Teco door.
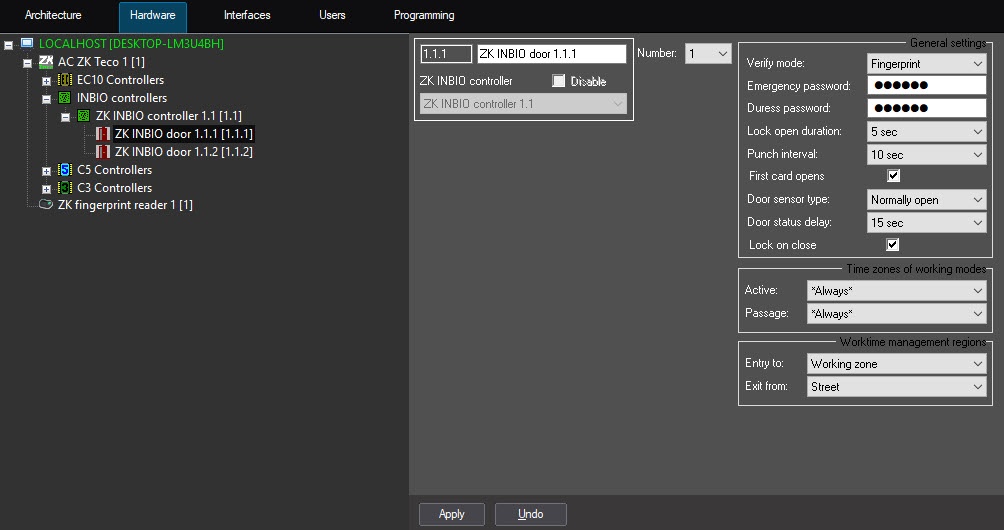
- From the Number drop-down list, select the number of the ZK Teco door.
- From the Verify mode drop-down list, select how access will be confirmed:
- Fingerprint—only a fingerprint is required for user verification. Only for the InBio door, not available in the C3 door settings;
- Password—only a password is required for user verification;
- Card—only an access card is required for user verification;
- Card or fingerprint—a card or a fingerprint is required for user verification. Only for the InBio door, not available in the C3 door settings;
- Card or password—a card or a password is required for user verification;
- Card and fingerprint—a card and a fingerprint are required for user verification. Only for the InBio door, not available in the C3 door settings;
- Card and password—a card and a password are required for user verification.
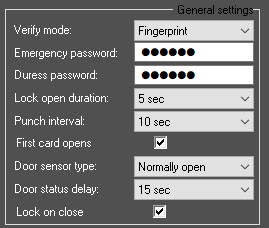
- In the Emergency password field, enter the password that is used to open the door without verification.
- In the Duress password field, enter the password that is used to open the door without verification and generating an alarm.
- From the Lock open duration drop-down list, select the time interval for which the lock will be opened:
- Closed—access is always closed. This is the default value.
- Open—access is always open.
from 1 sec to 254 sec—the time for which the lock will be opened after access is confirmed.
From the Punch interval drop-down list, select the time interval from 1 sec to 255 sec for presenting the access card. If you leave the Disabled (default) value, there is no time limit for presenting the access card.
- By default, the First card opens checkbox is set, so that an employee card with the First Person normally open access level is presented to open the door. To disable the setting, clear the checkbox. The First Person normally open access level is configured on the Access Control tab of the manufacturer software.
- From the Door sensor type drop-down list, select the sensor type:
- Disabled—an employee access event is generated automatically when an employee is identified;
- Normally open—an employee access event is generated when an employee accesses by closing the door reed switch (magnet);
- Normally closed—an employee access event is generated when an employee accesses by opening the door reed switch (magnet).
- From the Door status delay drop-down list, select the time in seconds from 1 sec to 255 sec after which a door hold alarm will be generated if the door isn’t closed. The default value is Disabled.
- By default, the Lock on close checkbox is set to lock the door after it is closed. To disable the setting, clear the checkbox.
- From the Active drop-down list, select the time zone in which the door will be active. If Never is selected, the door won’t be active.
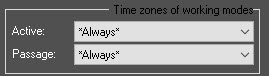
From the Passage drop-down list, select the time zone in which the door will always be open.
Note
The door will open no later than one minute after the start of the specified time zone.
From the Entry to drop-down list, select the region located on the exit side of the door.
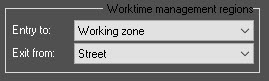
From the Exit from drop-down list, select the region located on the entry side of the door.
- Click the Apply
 button to save the changes.
Overview
Content Tools