
Go to documentation repository
Documentation for ACFA PSIM 1.3.
Previous page
![]()
![]() Next page
Next page
When the Rakinda device is connected, you can work with QR codes: generate a code, send it to the specified email address, and use it for passing. For this, do the following:
- Add the required Rakinda device as a control reader (see Configuring control readers in the Access Manager).
- Add the Rakinda extension in the user settings (see Adding biometric parameters).
- Select the Rakinda reader from the available extensions in the area below the user photo.
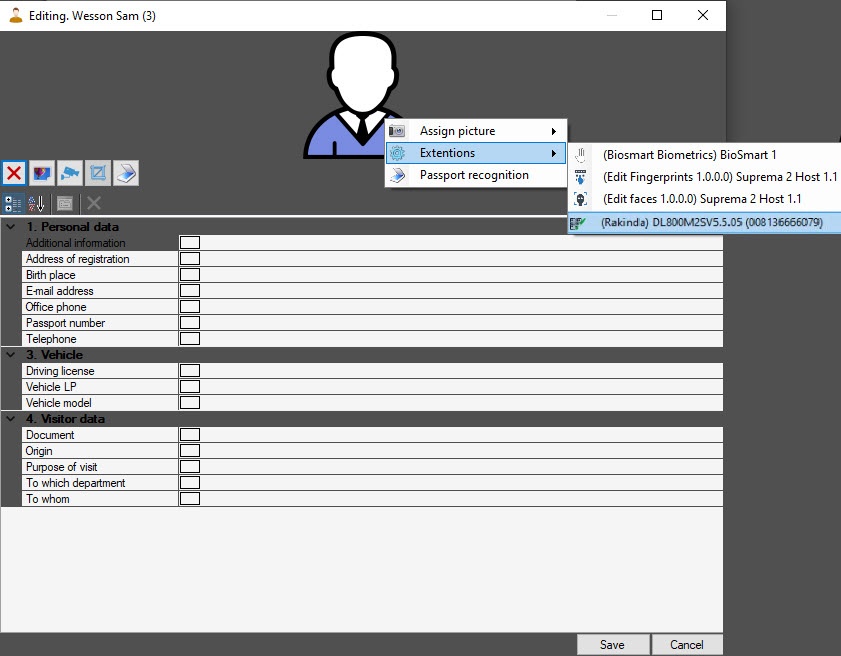
As a result, the Create QR code window will open.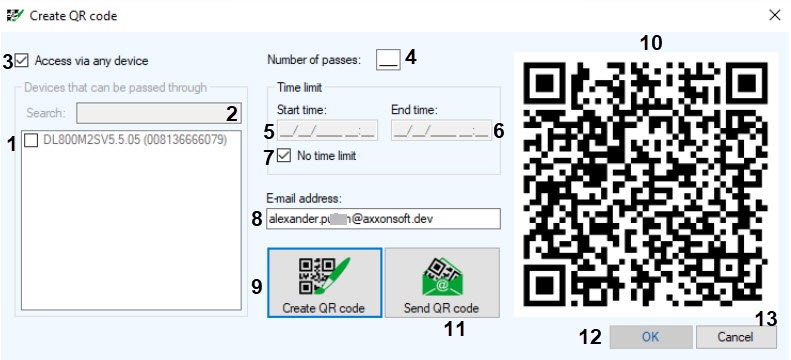
- In the Create QR code window, from the list of the available devices (1), select the device to receive the QR code of the user and give them access.
- You can also find the device using the search. To do this, in the search field (2), start entering the name of the device. The search works from the first character.
- Set the Access via any device checkbox (3) to receive the QR code of the user and give them access on all Rakinda devices.
- In the Number of passes field (4), specify the maximum number of passes, after reaching which the access will be denied.
- In order to set the time limit of user access, enter the start time (5) and the end time (6) of the interval in the corresponding fields.
- Set the No time limit checkbox (7) to make the user access unlimited in time.
- In the E-mail address field (8), enter the user email address to send the QR code.
- Click the Create QR code button (9) to generate a QR code. The generated QR code will appear in the area (10).
- Click the Send QR code button (11) to send the QR code to the user. If the SMTP server is configured correctly, the image will be sent to the specified email address.
Click the OK button (12) to save the changes, click the Cancel button (13) to exit without saving the changes.
Overview
Content Tools