Documentation for DetectorPack PSIM 1.0.1.

Previous page Camera requirements for the Sweethearting at checkout detection module  Barcode detection Next page

On the page:

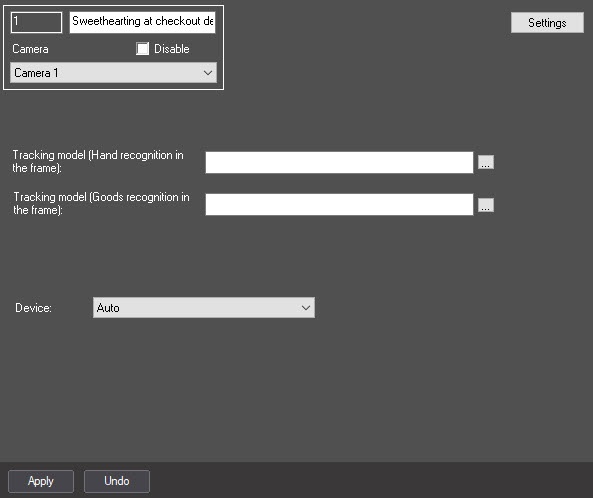
You can configure the Sweethearting at checkout detection module on the settings panel of the Sweethearting at checkout detection object created on the basis of the Camera object on the Hardware tab of the System settings dialog window.

Basic settings of the detection tool

To configure the Sweethearting at checkout detection module, do the following:

  1. Go to the settings panel of the Sweethearting at checkout detection object.
  2. By default, standard (default) neural networks of hand and goods recognition in the frame are initialized according to the device selected at step 3. If you want to use custom neural networks, click the button to the left of the Tracking model (Hand recognition in the frame) and Tracking model (Goods recognition in the frame) fields and in the standard Windows Explorer window that opens, specify the file of the corresponding neural network.
  3. From the Device drop-down list, select the device on which the neural network will operate: CPU, one of NVIDIA GPUs, or one of Intel GPUs. Auto (default)—the device is selected automatically: NVIDIA GPU gets the highest priority, followed by Intel GPU, then CPU.

    Attention!

Selecting area of interest

  1. Click the Settings button. The Detection settings window opens.
  2. Go to the Select area tab and click the Stop video button to pause the playback and capture a video frame.
  3. Click the Area of interest button to specify an area of interest. The button is highlighted in blue color.
  4. On the captured frame, use the mouse to set anchor points of the area where objects are detected. The rest of the frame is grayed out. The selected area must meet the requirements described in Camera requirements for the Sweethearting at checkout detection module. If you don't specify the area of interest, the entire frame is analyzed.

    Note

    • You can add only one area. If you try to add a second area, the first area will be deleted.
    • To delete an area, click the button to the right of the Area of interest button.

Configuring the detection tool parameters

  1. Go to the Parameters tab of the Detection settings window.

     
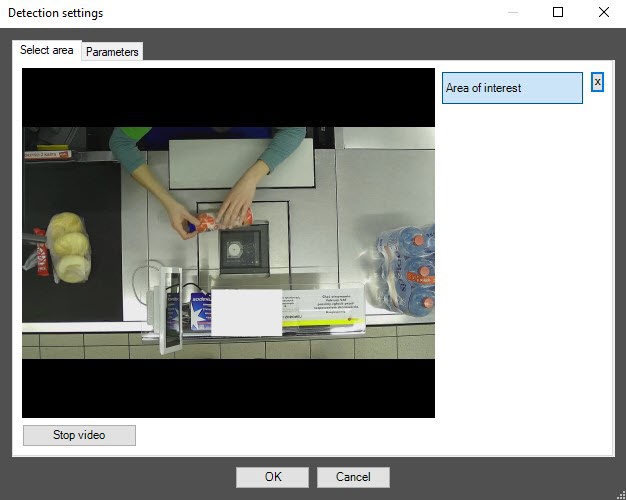
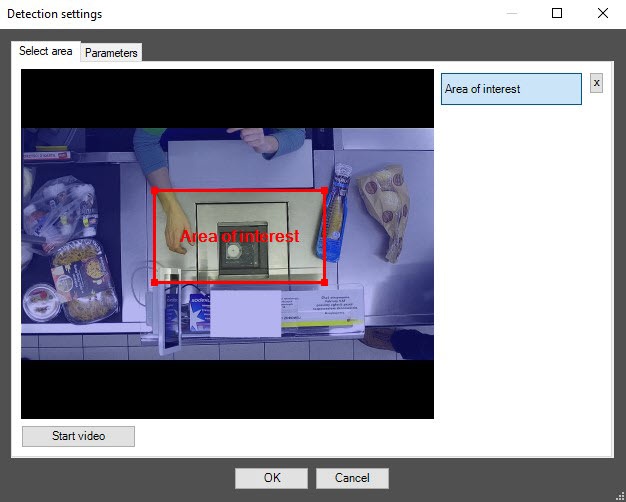
  2. In the Detection sensitivity [0.0, 1.0] field, specify the detection sensitivity in the range from 0.0 to 1.0. The default value is 0.65.

    Note

    The detection sensitivity value is selected experimentally. The lower the sensitivity, the greater the probability of false positives. The higher the sensitivity, the less chance of false alarms, however, some useful tracks can be skipped.

  3. In the Frames processed per second (0.016-100) field, specify the number of frames per second that the detection tool processes in the range from 0.016 до 100. The default value is 12.
  4. Click the OK button to save the changes and return to the settings panel of the Sweethearting at checkout detection object.

    Note

    To return to the settings panel of the Sweethearting at checkout detection without saving the changes, click the Cancel button.

  5. Click the Apply button to save the changes.

The Sweethearting at checkout detection module is now configured.

  • No labels