
Go to documentation repository
Documentation for Axxon One 2.0. Documentation for other versions of Axxon One is available too.
Previous page
![]()
![]() Next page
Next page
Note
Users without export permissions won't have the access to the ![]() icon, as well as to the possibility of selecting the export period on the timeline (see Roles).
icon, as well as to the possibility of selecting the export period on the timeline (see Roles).
To export a video, do the following:
- In the live mode (see Real-time video surveillance in the Web-Client) or in the archive mode (see Viewing video archives through the Web-Client), click the
 icon in the Surveillance window of a camera.
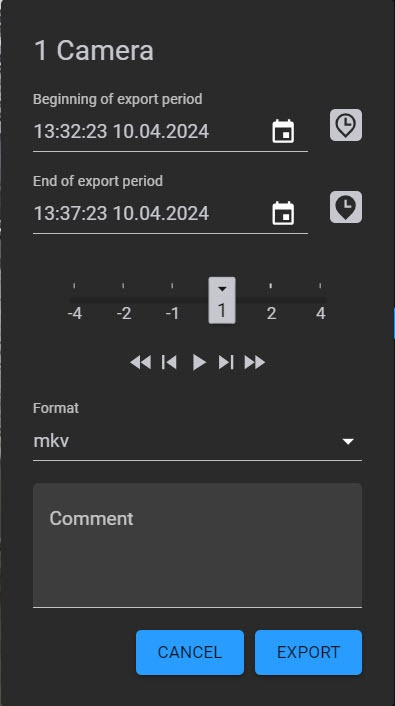
 - Export window will open.
- By default, the export period is the last five minutes of the archive. To specify the export period, you can use:
- The timeline:
- Set the pointer to the position corresponding to the beginning of the export period and click the
 button.
 - Set the pointer to the position corresponding to the end of the export period and click the
 button.
Note
To delete a period, click the
 button.
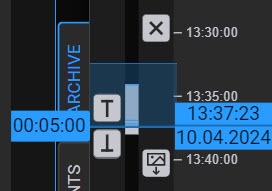
- Set the pointer to the position corresponding to the beginning of the export period and click the
- Export window:
- Specify the beginning and end of export period by entering the time and date in the Beginning of export period and End of export period fields. If you want the video to start from the moment where the pointer is set on the timeline, click the
 button next to the Beginning of export period field. As a result, the moment of video start will move to the pointer position. Click the
  button next to the End of export period field to set the end of video at the pointer position.
 - Or click the
 button and in the window that will open, specify the time and date of the beginning and end of export period.
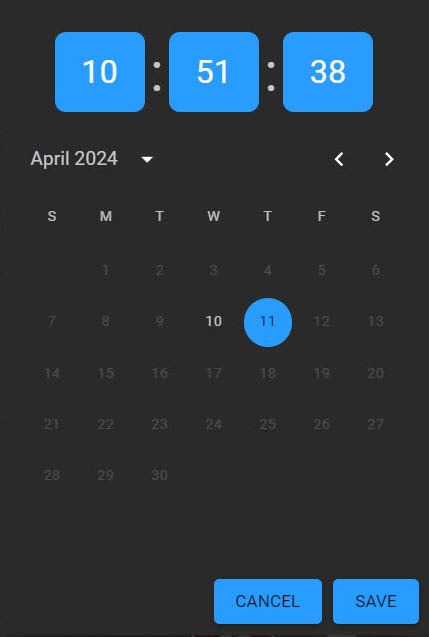
Note
You can select only the days on which the archive was recorded. The days on which the archive wasn't recorded aren't available for selection.
- Specify the beginning and end of export period by entering the time and date in the Beginning of export period and End of export period fields. If you want the video to start from the moment where the pointer is set on the timeline, click the
- The timeline:
- Select the speed and direction of video playback for export.
- From the Format drop-down list, select a video export format. If necessary, enter a comment for the export. The comment will be displayed as captions when you playback the exported video.
Note
- In Windows OS and Linux OS, you can export to AVI, MKV, MP4, JPG, and EXE formats.
- In macOS, you can export to AVI, MKV, MP4, and JPG formats. EXE files are not supported in this OS.
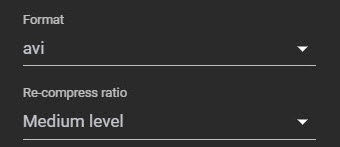
- If you export to AVI or MP4 format, select the Re-compression ratio of a video:
- Low level—minimum compression, maximum file size;
- Medium level (default)—medium compression, medium file size;
- High level—maximum compression, minimum file size
- To export a frame, select JPG format. On the timeline or in the export window, select the time to export the frame similar to specifying an export period for a video.
- Click the EXPORT button. Click the CANCEL button to cancel export.
The export progress is displayed on the drop-down panel as in the Client (see Viewing export progress).

When the export is complete, the panel color changes to green. To download an exported file, click its name on the panel.
![]()
Note
The text of the timestamp in the exported video will depend on the language selected in the browser.
Overview
Content Tools