Page History
...
- Download the distribution kit of a new version of AxxonData using the link.
- Run the installer of a new version of AxxonData as Administrator. You don't need to uninstall the prevous version.
- Perform the installation. The steps repeat the installation procedure (see Installation of AxxonData).
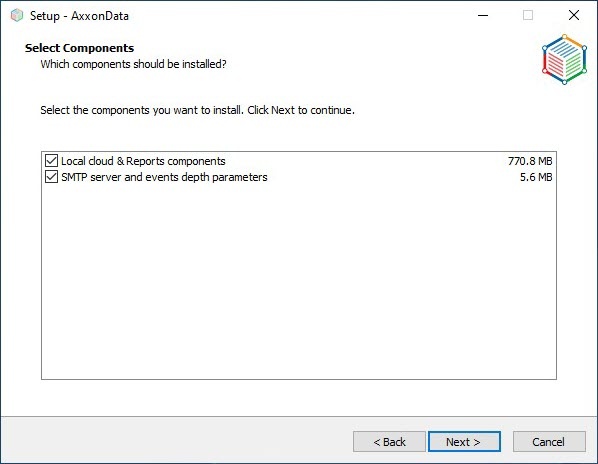
- Set the checkboxes next to the components that you want to install:
- If you want to update only AxxonData and PostgreSQL 10:
- Set the Local cloud & Reports components checkbox.
- Click Next.
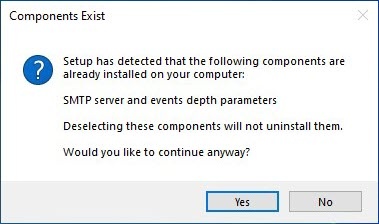
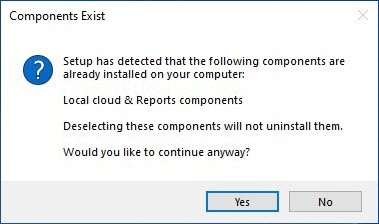
- In the window that opens, click Yes:
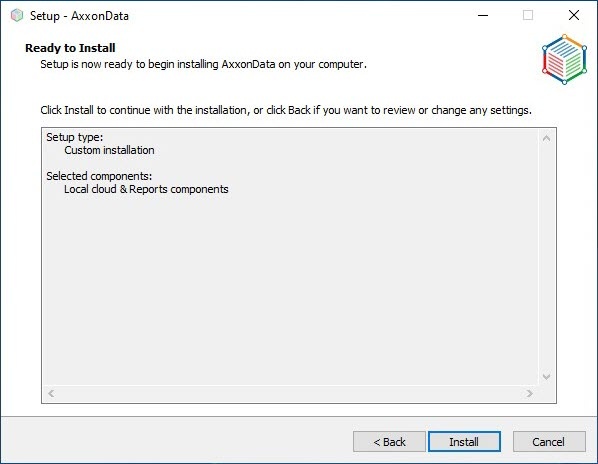
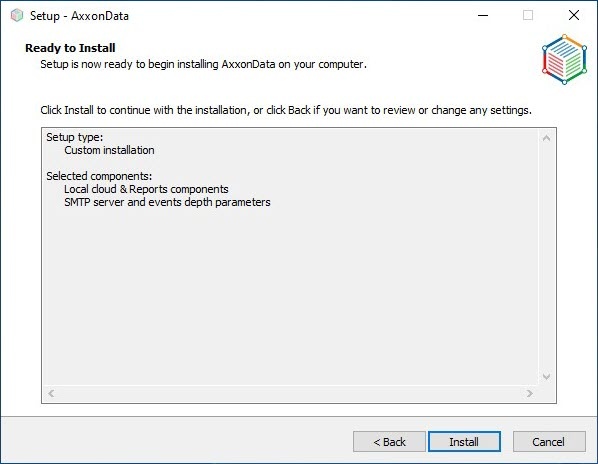
A window opens to confirm the installation of the selected components of AxxonData:
- If necessary, update the parameters of the SMTP server and depth of event storage:
- Set the SMTP server and events depth parameters checkbox.
- Click Next.
- If you want to update only AxxonData and PostgreSQL 10:
- Click Install:
Installation of AxxonData and PostgreSQL 10 starts. - Update the SMTP server parameters (see Updating the parameters of the SMTP server).
- Click Next.
- Update the depth of event storage in days. By default, it is 60 days.
- Click Next.
- Click Finish and restart the computer.
...
- Run the AxxonData installer as Administrator.
- Perform the installation. The steps repeat the installation procedure (see Installation of AxxonData).
- Set the SMTP server and events depth parameters checkbox:
- Click Next.
- In the window that opens, click Yes:
- Click Install.
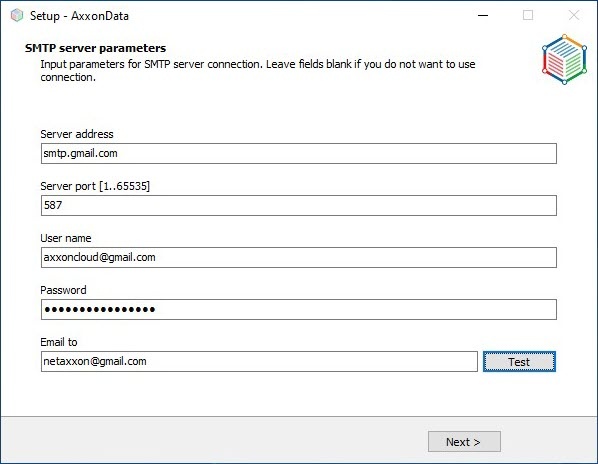
- Specify the SMTP server parameters:
- In the Server address field, enter the SMTP server for outgoing mail.
- In the Server port [1..65535] field, enter the port number used by the SMTP server for outgoing mail.
- In the User name field, enter the full email of the account used to send messages on the SMTP server for outgoing mail.
- In the Password field, enter the 16-character code without spaces generated when configuring the SMTP server for outgoing mail.
- In the Email to field, enter the email of the account to which a message will be sent about the correctness of the entered SMTP server parameters.
- Click the Test button.
Note title Attention! A message will be displayed if you specified the parameters of the SMTP server:
- Correctly: Test message is successfully sent. Please check your email.
- Incorrectly: An error occurred while sending the test message. Please check the parameters to connect to the SMTP Server.
- In the Server address field, enter the SMTP server for outgoing mail.
- Click Next.
- Click Next
- Click Finish and restart the computer.
...
Overview
Content Tools

