
Go to documentation repository


Page History
...
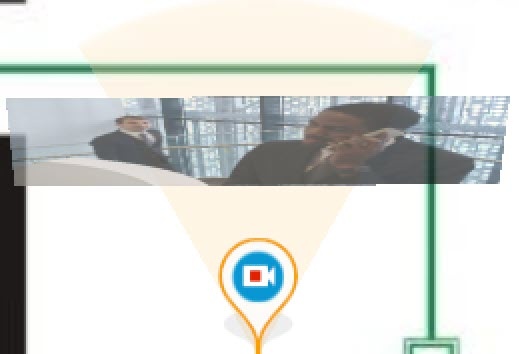
Cameras are added to the map. Possible states of cameras and their icons:
| Icon | State |
|---|---|
| The camera is disarmed. Recording to the archive isn't performed |
| The camera is disarmed. Recording to the archive is performed |
| The camera is armed. Recording to the archive isn't performed |
| The camera is armed. Recording to the archive is performed |
| The camera is alarmed. Recording to the archive is performed |
| Connection with the camera is lost |


Interface control and configuration commands:
| Menu command | Result |
|---|---|
| Arm |
|
| Arm in private mode (see Arm and disarm a camera) |
|
| Disarm |
|
| Show video | The video area is displayed
|
| Hide video | The video area isn't displayed |
| Show layout | The selected camera is displayed on a dynamic layout. To display several selected cameras on a dynamic layout, see Select several cameras to display on a dynamic layout |
| Copy | If you left- or right-click any cell in the layout, the video from the copied camera will be displayed in that cell. The copied camera remains visible in the layout until you switch to another layout or restart the client |

Add an output to the map
To add an output (see Output) to the map:
- Go to the map edit mode.
- Click the Objects panel
 button (see Object panel).
 - Drag the required output to the map. To delete an output from the map, click the
 button.
An output is added to the map. Possible states of outputs and their icons:
| Icon | State |
|---|---|
| Output is activated (closed) |
| Output is in a normal state (open) |


| Info | ||
|---|---|---|
| ||
When the state of an output is changed with a macro, the output icon on the map doesn't change (see Programming). |
Interface control and configuration commands:
| Menu command | State |
|---|---|
| Output off |
|
| Output on |
|
| Info | ||
|---|---|---|
| ||
You cannot switch the state of an output from the map if macros with the corresponding action are present in the system (see Switch on/off output). |
Add an input to the map
To add an input (see Input) to the map:
- Go to the map edit mode.
- Click the Objects panel button (see Object panel).
- Drag the required input to the map. To delete an input from the map, click the button.
An input is added to the map. Possible states of rinputs and their icons:
| Icon | State |
|---|---|
| The camera is armed. The input is in a normal state |
| The camera is armed. The input is alarmed |
| The camera is disarmed. The input is in a normal state |
| The camera is disarmed. The input is alarmed |


For the Tibbo board inputs (see Setting up Tibbo relay/loop boards), the map also displays temperature and humidity values.

The appearance of the input icon depends on the camera to which it belongs.
Add a macro to the map
To add a macro (see Programming) to the map:
- Go to the map edit mode.
- Click the Objects panel button (see Object panel).
- Click the Programming button in the lower left corner of the screen.
- Drag the required macro to the map. To delete a macro from the map, click the button.
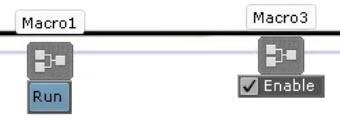
By default, the start button is displayed on the map for the Event rules macro. The enable/disable checkbox is displayed on the map for the Cycle rules macro (see Configuration of macros). To hide macros, clear the Show buttons checkbox. In this case, macros are only available via the context menu.
A macro is added to the map.
Commands to control macros and configure the interface:
| Menu command | Condition | Function performed |
|---|---|---|
| Run | Event rules macro | Start a macro |
| Enable | Disabled cycle rules macro | Enable a macro |
| Disable | Enabled cycle rules macro | Disable a macro |
You can also control macros using the Run button and the Enable checkbox. By default, macro icons don't change.
Overview
Content Tools