
Go to documentation repository


Page History
...
An output is added to the map. Possible states of outputs and their icons:
| Icon | State |
|---|---|
| Output is activated (closed) |
| Output is in a normal state (open) |


| Info | ||
|---|---|---|
| ||
When the state of an output is changed with a macro, the output icon on the map doesn't change (see Programming). |
...
For the Tibbo board inputs (see Setting Set up Tibbo relayinput/loop output boards), the map also displays temperature and humidity values.
...
- By dragging:
- Go to the map edit mode.
- Using your mouse, select the tab of the map to which you want to create a transition and drag the transition icon
 to the required place on the map. To delete a transition from the map, click the
  button.
- Using the context menu of the map:
- Go to the map edit mode.
- Right-click anywhere on the map.
- Select Add transition to map.
- Select a map created in the system to which you want to create a transition. To delete a transition from the map, click the button.
...
To exit immersion mode, do one of the following:
- Click the Exit immersion mode Switch to 2D-map mode
 button.
 - Zoom out on the surveillance window by clicking the Zoom out the tile
 button.
 - Click an area of the map that doesn't contain the camera's field of view.
| Info | ||
|---|---|---|
| ||
|
...
- Go to the map edit mode.
- Go to immersion mode.
- Left-click the video image to add connection points. You must add at least six connection points. To delete a connection point, hover the cursor over it and click the button. The calibration is recalculated if you delete a point. After you add all connection points, you can adjust their positions by dragging them with the left mouse button pressed. To reset all connection points, click the Cancel changes Reset changes
 button.
Note title Attention! When you set a point on the video, the following rules must be met:
- All connection points must lie on the same horizontal plane. We recommend placing the points on the floor or on the ground.
- We don't recommend placing three points in a straight line.
- The points must demonstrate the perspective of the plane.
- When you set the sixth point, it is possible that the second connection point cannot be placed in certain locations. This happens because the system cannot determine the correct viewing angle to display the video and the map with the set connection points. Most likely, you set the connection points incorrectly.
- If calibration is available, the Apply calibration
 button appears after you add a sixth point (or more), allowing you to calibrate the connection points on the map.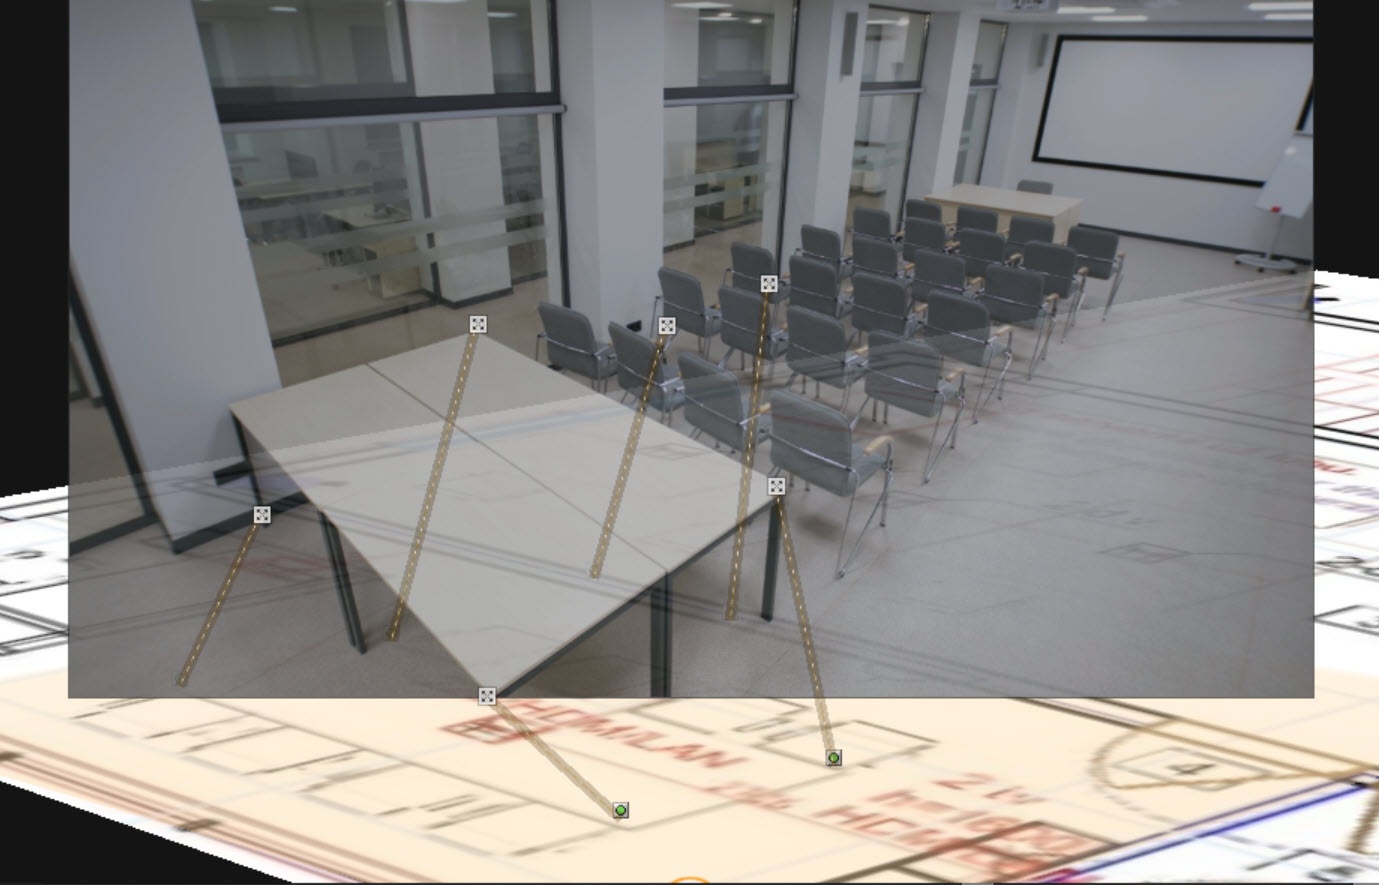
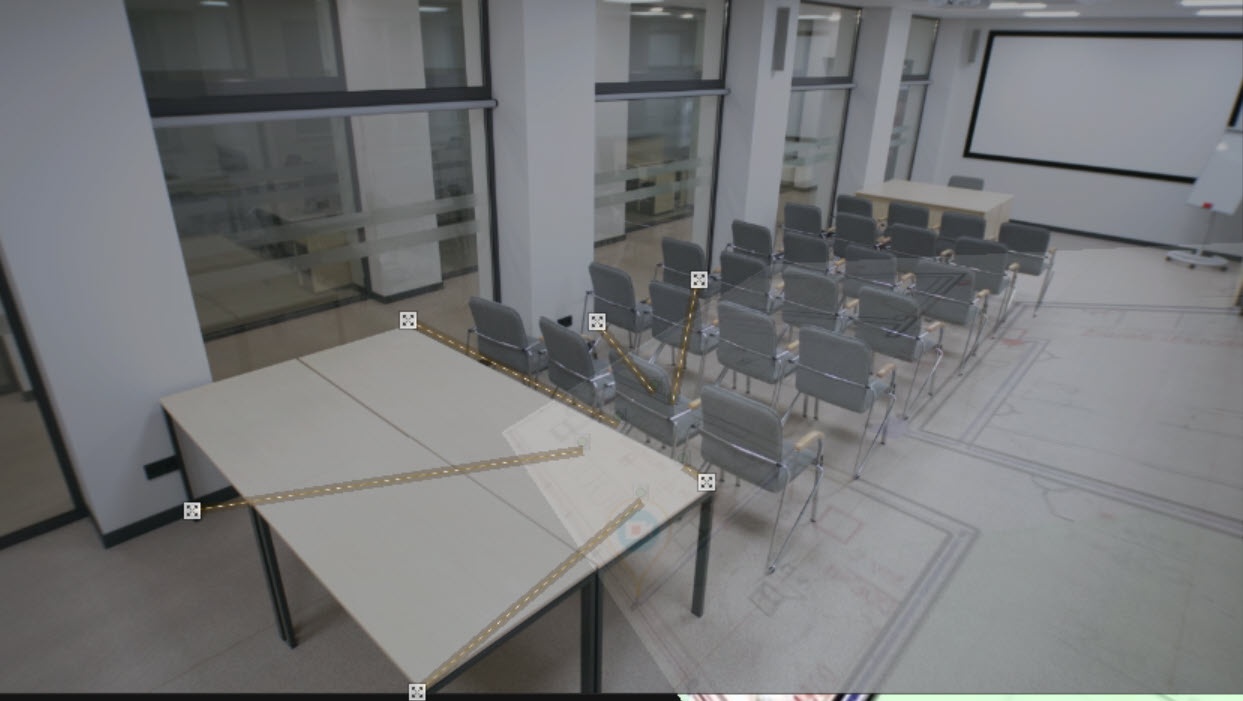
- Click the Save
 button. To cancel actions, click the Cancel
  button.
Note title Attention! The specified connection points are reset if you perform any of the following actions before you save the changes and exit:
- If you change the place of the camera's icon on the map.
- If you change the angle of the display area on the map.
- If you change the camera's field of view on the map.
After you update from previous versions to Axxon One 3.0/3.1 or higher, the connection points used to link the camera to the map are reset. You must set the connection points again.
...
- Add a new floor to the map:
- Go to the map edit mode.
- Select a map to which you want to add a floor.
- Right-click and select Add floor to child map.
- Configure the settings listed in the table.
- Click the Apply
 button. To cancel actions, click the Cancel
  button.
If necessary, repeat the steps, adding a new floor to the last created floor.
A floor is added.
- Add a map as a floor:
Note title Attention! When you add floors, note the following:
- You can add a map as a floor only if the map doesn't have any lower-level floors of its own. In other words, the map that you want to add must not contain nested floors.
- You can add a floor to a map only if that map isn't a floor of another map—meaning it must not have a parent floor.
- If both maps are already part of different floor hierarchies, those hierarchies cannot be merged. Only a map that is not linked to another hierarchy can be added as a floor.
- If any of the listed conditions isn't met, the Add as child map option doesn't appear in the context menu.
- Maps that you can get from map providers cannot be used as floors or included in a floor hierarchy.
- Go to the map edit mode.
- Select a map you want to add as a floor.
- Right-click and select Add as child map.
- Select the map to which you want to add a map as a floor.
- Click the Apply button. To cancel actions, click the Cancel button.
A map is added as a floor.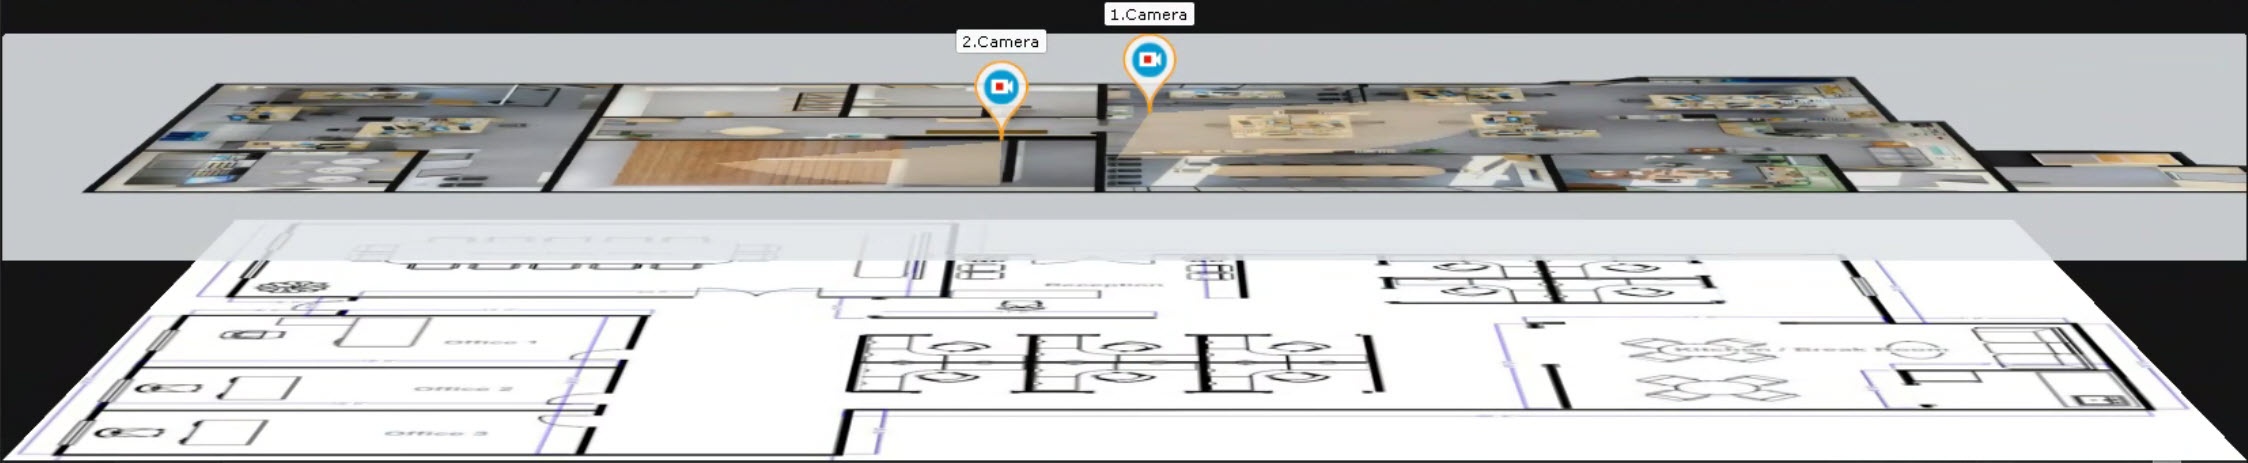
...
- Go to the map edit mode.
- Select the required floor, left-click its image, and drag it to the required place. Both the selected floor and its child floors will move.
- To rotate or resize the floor image, click the Rotate/Resize Change camera viewing direction
 button and, while holding it down, rotate or resize the image.
 - Click the Save button. To cancel actions, click the Cancel button.
...
Overview
Content Tools