
Go to documentation repository


Page History
| Section | |||||||||||||||||||||
|---|---|---|---|---|---|---|---|---|---|---|---|---|---|---|---|---|---|---|---|---|---|
|
Configuring LDAP
To configure the LDAP catalog, do the followingTo connect to an LDAP catalog:
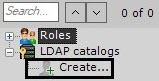
In the LDAP catalogs group, click Create
....
An LDAP 1 object is added in the system. On the right, a panel displays configuration settings for the LDAP 1 catalog. Enter - In the Name field, enter a name for the catalog in the appropriate field (1)
- .
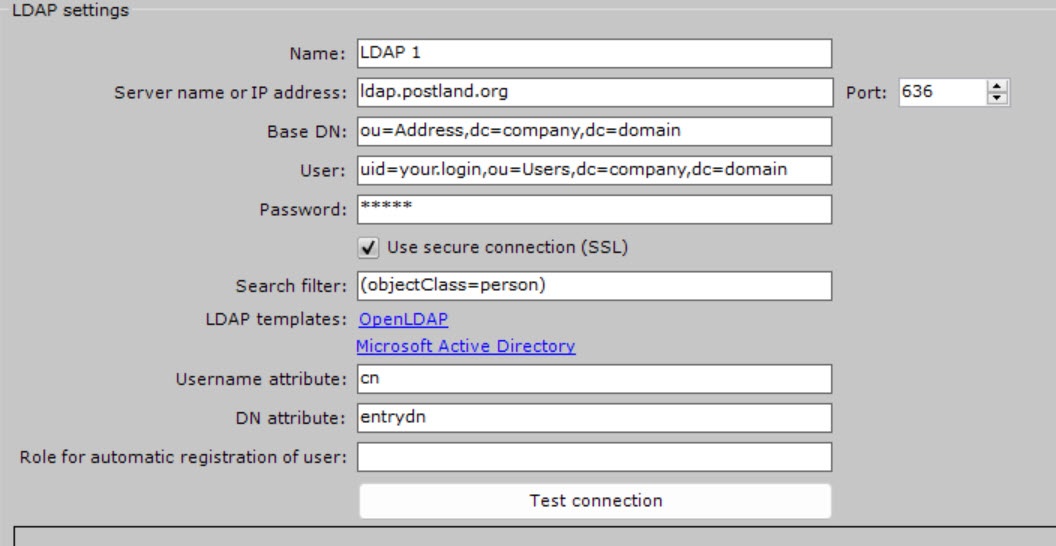 Enter the address of the LDAP catalog server (2) and port (3)
 - In the Server name or IP address field, enter the address of the LDAP catalog Server.
- In the Port field, enter the connection port of the LDAP catalog Server.
In the Base DN field, enter the Distinguished Name of the branch, from which
to start search (4)the data search starts.
Note title Attention! - If LDAP users are located in multiple directories with a
tree-like - hierarchical structure, you cannot
establish instant synchronization across - synchronize all users at the same time.
- To synchronize each user group within a DN branch, you
have to - must specify the path to the corresponding directory.
For example, LDAP contains a directory Employees
including subdirectories - must specify the path to the corresponding directory.
- and subdirectories Managers, Cashiers and Salesmen
.- :
- DN branches for synchronizing users
within - :
- within Managers directory: ou=Managers,ou=Employees,dc=example,dc=com.
- DN branches for synchronizing users
within - within Cashiers directory: ou=Cashiers,ou=Employees,dc=example,dc=com.
- DN branches for synchronizing users
within - within Salesmen directory: ou=Salesmen,ou=Employees,dc=example,dc=com.
Enter - In the User field, enter the name of a user who has write
- a read access to the base DN, in LDAP format
- LDAP (RDN + DN) with password (5).If encryption (SSL) is required for connecting to the LDAP server, select the corresponding check box (6)
- format.
- In the Password field, enter user password.
- Set the Use secure connection (SSL) checkbox if you want to use secure connection (SSL) when connecting to the LDAP catalog.
In the Search filter field, enter a string for filtering catalog entries
(7).
Note title Attention! To upload users by groups, not by
directoriescatalogs, you
should must use the
Member Of MemberOf filter attribute. For example:
(&(objectClass=user)(memberof=CN=YourGroup,OU=Users,DC=YourDomain,DC=com).
In the Username attribute field, enter the
field attribute, from which the
user's login username is obtained
(8).
Info title Note To search for users by the sAMAccountName attribute
sAMAccountName, you must enter
their names in small letters – the attribute in lowercase letters—samaccountname.
In the DN attribute field, enter the
field attribute, from which the user's DN is obtained
(9).
Info title Note To set a login and DN attribute, you You can use Microsoft Active Directory and OpenLDAP LDAP templates in the LDAP templates
. To use a template, click the relevant link (10).Specify a default user role for users created via LDAP (11). If no role is specified, no automatic user creation will be possible for this catalogparameter to specify the username and DN attribute.
- In the Role for automatic registration of user field, enter a role, to which new users of the LDAP catalog are automatically added. If you don't specify a role, automatic user creation for this catalog is disabled.
- Сlick the Apply
 button.
The LDAP catalog is now added to the system.
To test the connection, click the Test connection button. If connection is successful, the form on in the lower part of the screen displays information about the catalog users. 
Otherwise, an error message appears.
Copying the LDAP catalog
To copy a catalog with all settings, do the following:
- Click the name of the catalog that you want to copy.
- Click the Create button.
A new catalog with identical settings is created. The default name of the new catalog is LDAP 1, LDAP 2, and so on, depending on the number of previously created catalogs.
Removing the LDAP catalog
To remove a catalog, do the following:
- Click the name of the catalog that you want to remove.
- Click the Remove
 button.
The selected catalog is removed.
Overview
Content Tools