
Go to documentation repository
The Report by first and last card presenting per calendar day is a table which contains the information about the first and last time the selected employee presented the card to the access point. Working schedules are ignored in the report, the data is displayed per calendar day. All access points are analyzed during the report generation.
| Info | ||
|---|---|---|
| ||
You can use templates when you create a report. To add a new template, click Report templates → New template and fill in the Name and Description fields. The template will use the selected parameters of the current report. Templates work the same way as templates in the scheduler and can be used interchangeably. When you create a response using a template, click Report templates at the top of the page and select the required template from the list of saved templates (the required template is highlighted). As a result, the parameters of the current report are updated according to the selected template. |
The Report by first and last card presenting per calendar day is a table that contains the information about the first and last time the selected employee presented the card to the access point. Working schedules are ignored in the report; the data is displayed per calendar day. All access points are analyzed during the report generation.
To create the the Report by first and last card presenting per calendar day, do the following:
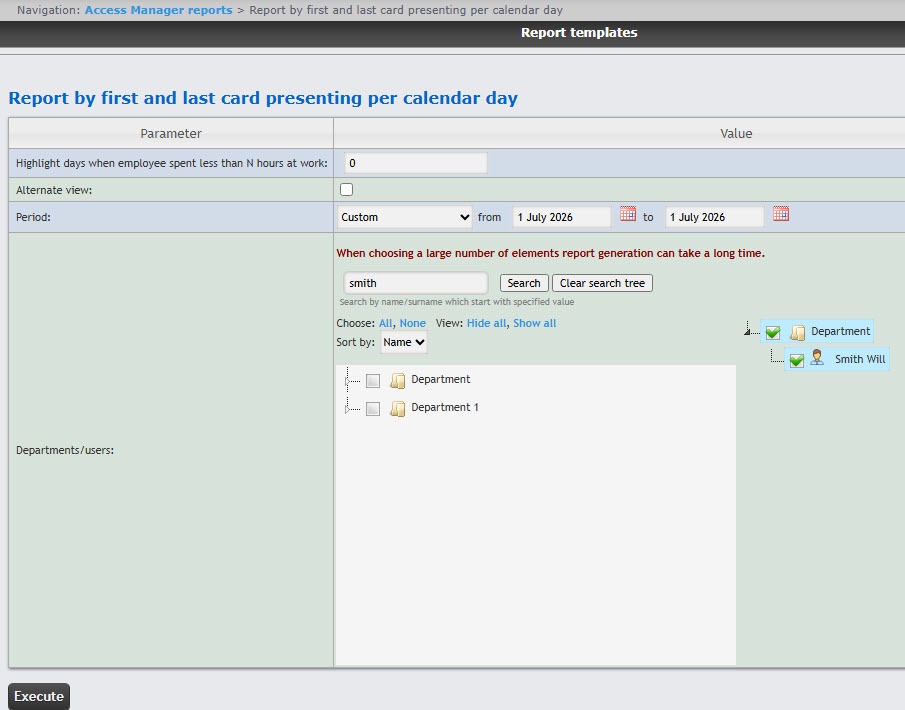
 button near the corresponding field to use the Calendar tool.
As a result, You can save the report with the specified parameters will be displayedin the following formats:
Example of a Report by first and last card presenting per calendar day.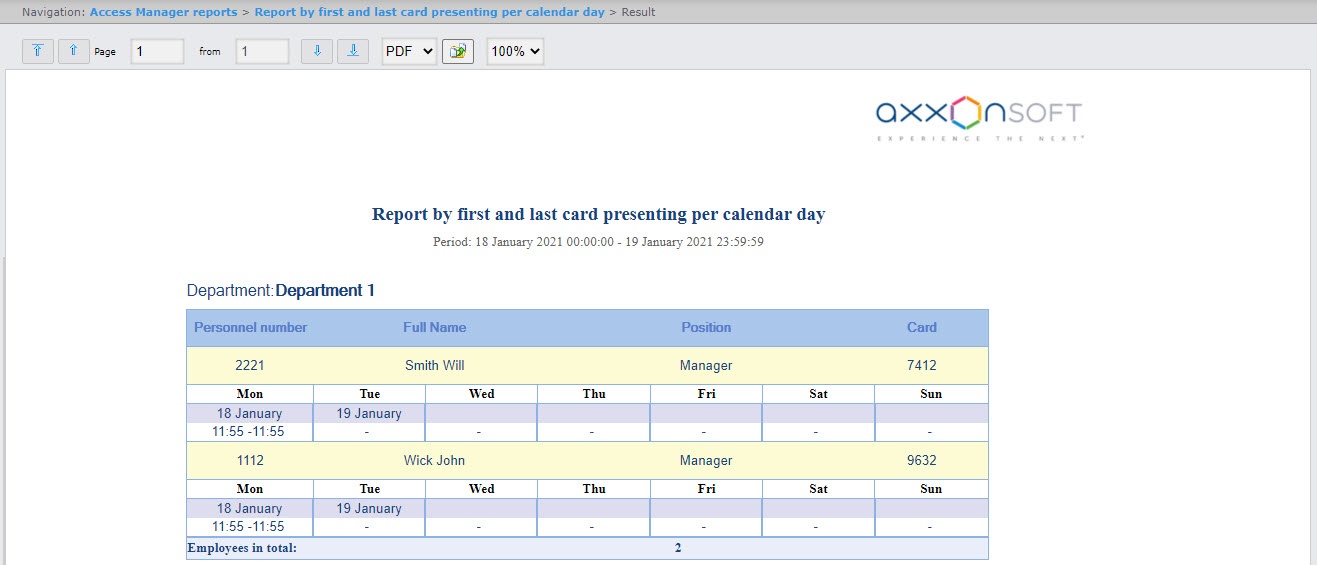
The report fields are described in the table.
| Field | Description |
|---|---|
| Personnel number | Personnel number of an employee |
| Full Name | Full name of an employee |
| Position | Position of an employee |
| Card | Employee card number |
| Time of first/last presenting of card | A table indicating the time of the first/last presenting of the card on each day within the selected time period |
| The Employees in total line displays the number of employees included in this report | |
| Info | ||
|---|---|---|
| ||
If the report was is created automatically in Excel format (see Setting up WEB Set up the operation of the Web Report System PSIM operation in the automatic mode), it will contain the information about the department to which the employee belongs. |
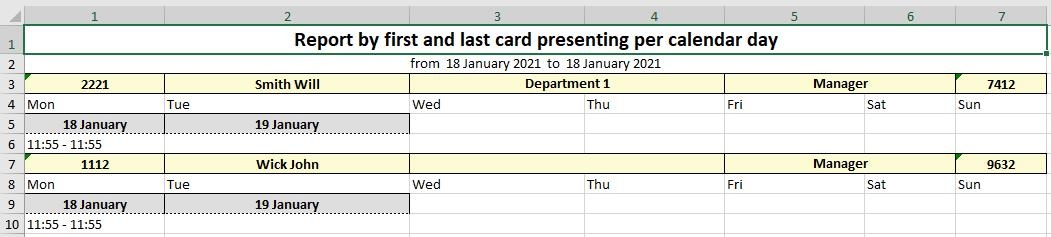
The Report by first and last card presenting per calendar day is created.

