
Go to documentation repository
| Info | ||
|---|---|---|
| ||
You can use templates when you create a report. To add a new template, click Report templates→New template and fill in the Name and Description fields. The template will use the selected parameters of the current report. Templates work the same way as templates in the scheduler and can be used interchangeably. When you create a response using a template, click Report templates at the top of the page and select the required template from the list of saved templates (the required template is highlighted). As a result, the parameters of the current report are updated according to the selected template. |
The Recognized number plates report allows getting data about the license allows you to get information about the license plates recognized within a specified time period.
| Info | ||
|---|---|---|
| ||
The Recognized number plates report is related to is a part of the LPR channel system object module. To obtain get the information about vehicle types, use the the RoadAR vendor and model recognizer module or module or the Vehicle type recognition module (it is necessary to . You must create and configure the corresponding objects in Axxon PSIMin Auto PSIM (see Setting up the LPR channel, Configuring the RR vendor and model recognizer module, and Setting up the Vehicle type recognition module). |
...
To create the Recognized number plates report, do the following:
...
select it from the list of AUTO reports (see Select the type of
...
...
and specify the report parameters in the form that opens.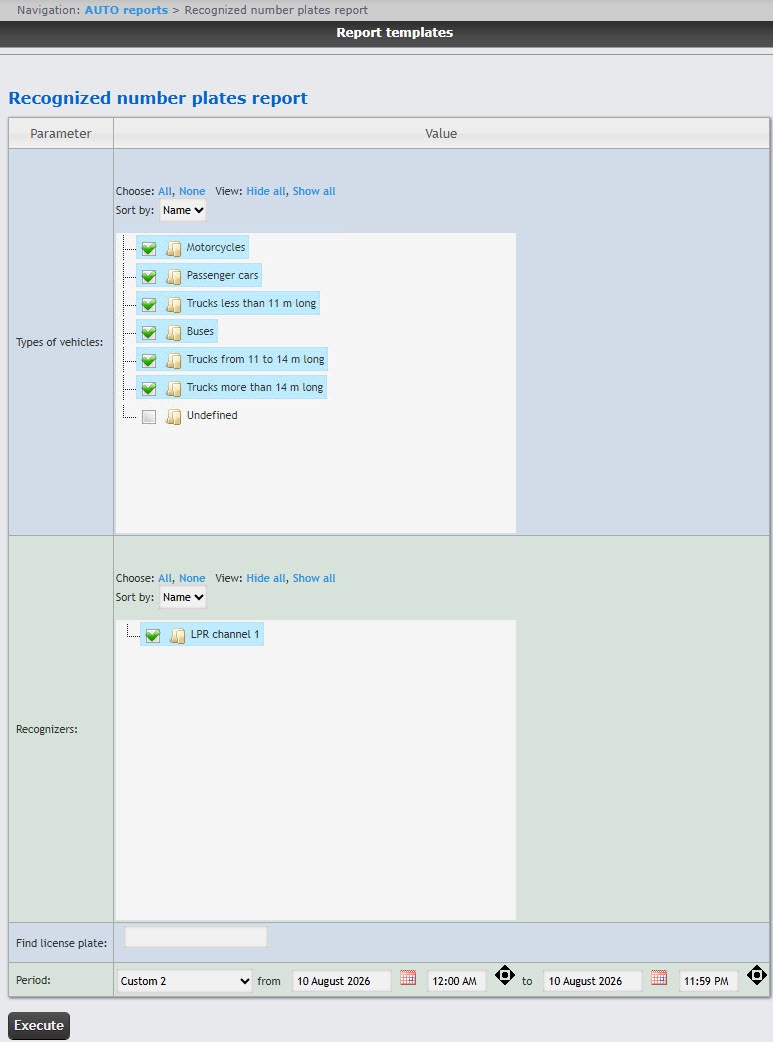
Specify the report parameters in the following way:
From the button near the corresponding field to use the Calendar tool.
  button
Click the Execute button to create the report.
| Note | ||
|---|---|---|
| ||
If the |
images and frames of the recognized license plates and the |
vehicles are stored in a folder on a disk, then to display the screenshots from |
a camera, |
you must configure the storage source for license plates and |
frames (see Configuring the storage source for Recognized number plates report and Recognized railway numbers report). |
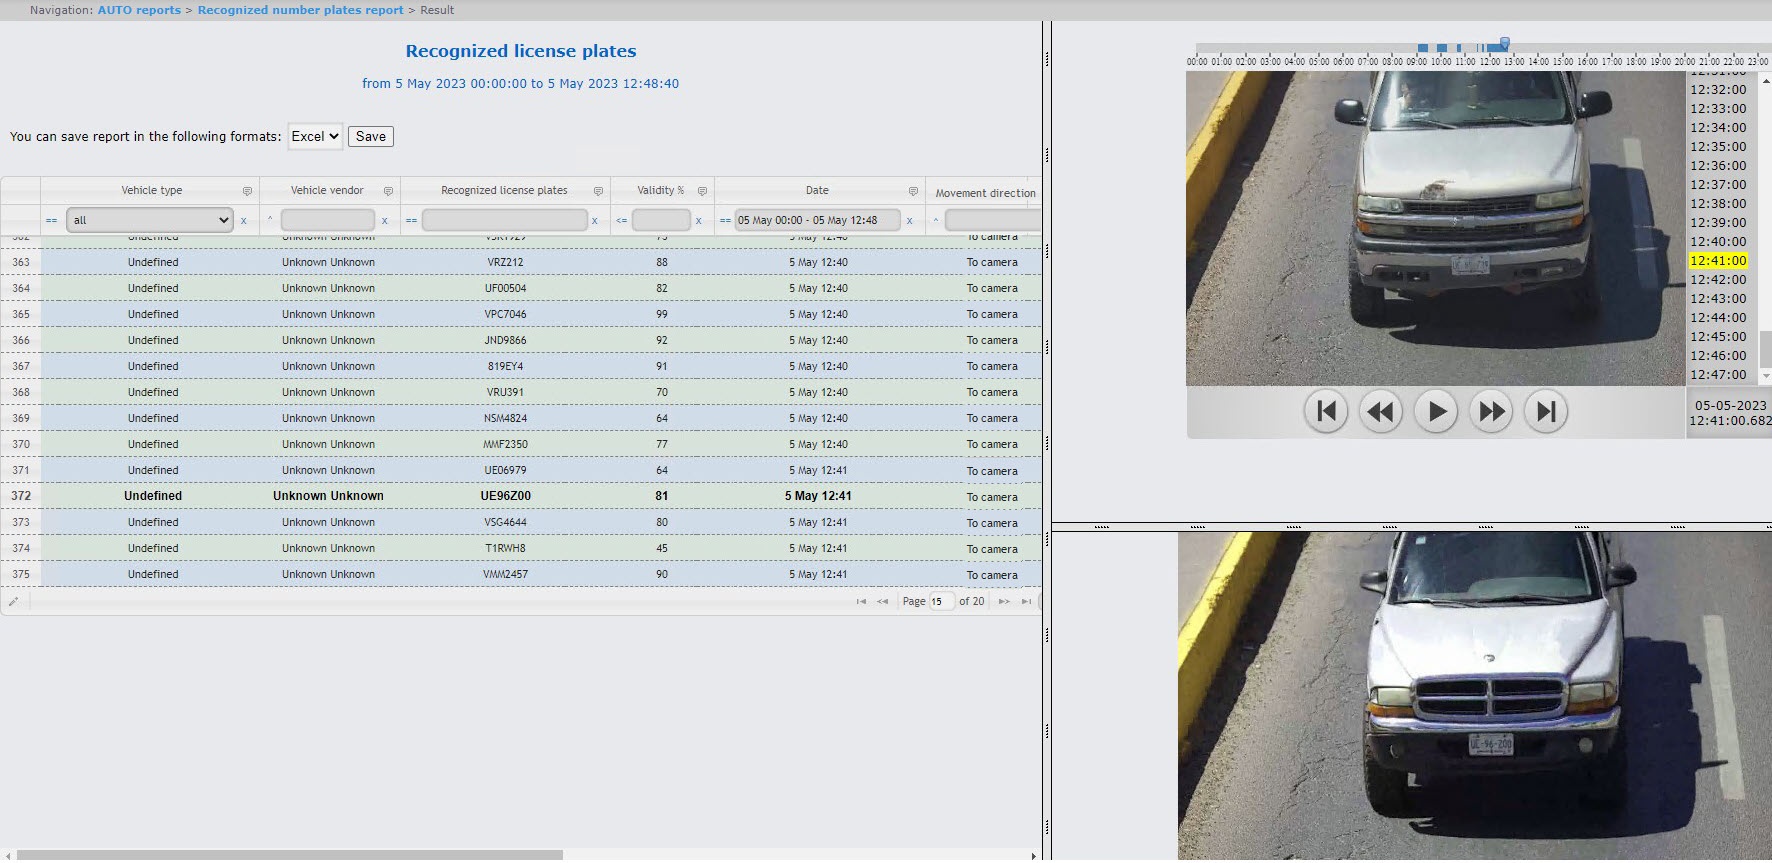
The report table
contains the vehicle type, vehicle
make, recognized
license plate, recognition accuracy
as a percentage, date of recognition, direction of movement, recognizer, vehicle speed (km/h), operator's comment. When you click
a row in the table, a screenshot from
a camera
is displayed
in the lower right corner of the report
, and, if there is access to the video archive, the video
is played
in the upper right corner of the report
.
| Info | ||
|---|---|---|
| ||
Working with this table is described in |
Recognized number plates report and Recognized railway numbers report |
. |
To save the report to a file, select the
report format and click the Save button. You can save the report in the following formats:
| Info | ||
|---|---|---|
|
...
The number of entries in the report is unlimited. You can use forward and rewind buttons to view the contents of the report. When you save the result in PDF format, it is split into files of 1000 entries each. The names of files contain the range of license plates and date when the report was created. You can change the number of entries in one document in the Web.config file by specifying a new value for the ReportsWithPhotoPdfPageSize key (see Configuration of the number of entries in a file and the resolution of the license plate image in the Recognized number plates report). |
The Recognized number plates report is created.

