Go to documentation repository
Page History
| Tip |
|---|
To create a local archive, do the following:
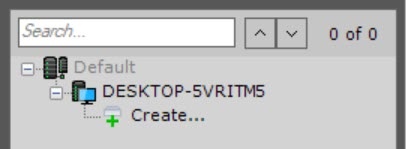
- Go to the Archive tab.
In the branch of
the the Server object
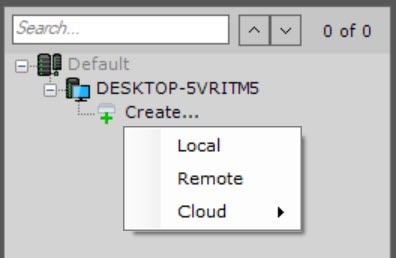
corresponding to the computer on which you need to organize an archive, click the Create... link.
- Select the Local archive type.
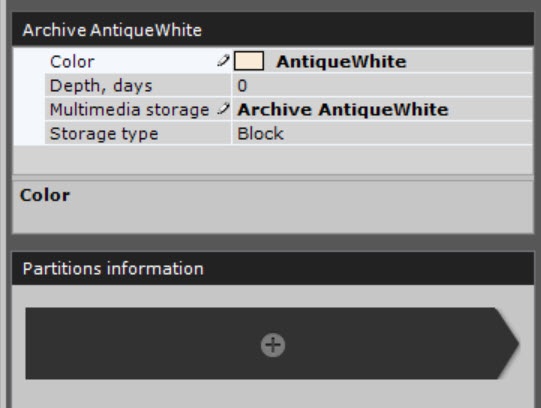
- Specify the name and color of the archive (1). Select the storage type (2):
- In the Color field, select the color of an archive.
- If necessary, in the Depth, days field, specify the maximum depth of storing an archive in days. If you specify the 0 value, the archive depth is unlimited (see Configuring recording to an archive).
- In the Multimedia storage field, specify the name of an archive.
- In the Storage type field, select the type of archive storage:
- Block
block - , if you need low latency and high performance in various situations. For example, for tasks with a large read and write load;
objectObject, if
a technical support specialist recommended you
to use this type of storage.need to be able to change the size of an archive volume without restarting the system (see General information about the Round-robin algorithm), as well as to encrypt an archive volume (see Encrypting a volume of an object archive).
In the Partitions information section, click the + button.
As a result, a panel for configuring an archive volume opens.Configure archive volumes:
- Set
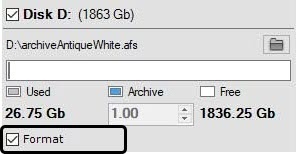
- checkboxes next to the disks that you want to include in the archive.
If a disk
does not doesn't have a file system, the disk can contain an archive volume in the form of a partition. In this case, set
the the Format checkbox. This will format the disk to the SolidStore file system developed by AxxonSoft (see General information
of Note title Attention! - When
selecting the - you select a disk on which to place the archive volume, take into account its
space- capacity. If the archive is completely full, the oldest data
will be - is overwritten with new data.
The - You can delete the file system on the disk
can be erased by - using the standard Disk Management utility in Windows OS. For the manual for starting and using the utility,
see - see Microsoft website. Deleting the file system on the disk in the Disk Management utility consists of the following:
- delete logical disk;
- create a new disk in the resulting
- see Microsoft website. Deleting the file system on the disk in the Disk Management utility consists of the following:
unformatted - unallocated area
.- ;
- assign a letter to the disk, but do not format it.
The system disk cannot be completely allocated for an archive.
- You cannot create an archive volume as a partition on a removable disk, since its partition cannot be
erased - deleted through the Disk Management utility.
On disks that have a file system, you can store an archive volume in the form of a file.
For this archive volume, you must enter a file size (in gigabytes) or set it by moving the slider. The size of
the an archive file must be greater than or equal to 1 GB. For the Fat32 file system, the maximum archive size is 4 GB.
Note title Attention! - If the archive is completely full, the oldest data will be overwritten with new data.
- By default, the file name
will be - is the same as the name of
the - an archive, and the file
will be - is located at the root directory of the disk. To change the name and/or location of the file, click the
- button.
- Click the Apply button.
If volumes are configured in the form of partitions, a dialog box will be - window is displayed, warning about formatting of the relevant system disks.
- Read through
- the list of partitions that will be formatted.
- If the list is correct, set the
- the I have read the warning and realize the risk of losing important data checkbox , then click
- .
- Click the Format button. Otherwise, click the Cancel button to return to the archive settings.
| Note | ||
|---|---|---|
| ||
It is not recommended to use object type of storage without prior consultation with AxxonSoft technical specialist. |
Configure archive volumes.
Set theCreation of the a local archive is now complete.


