


General information
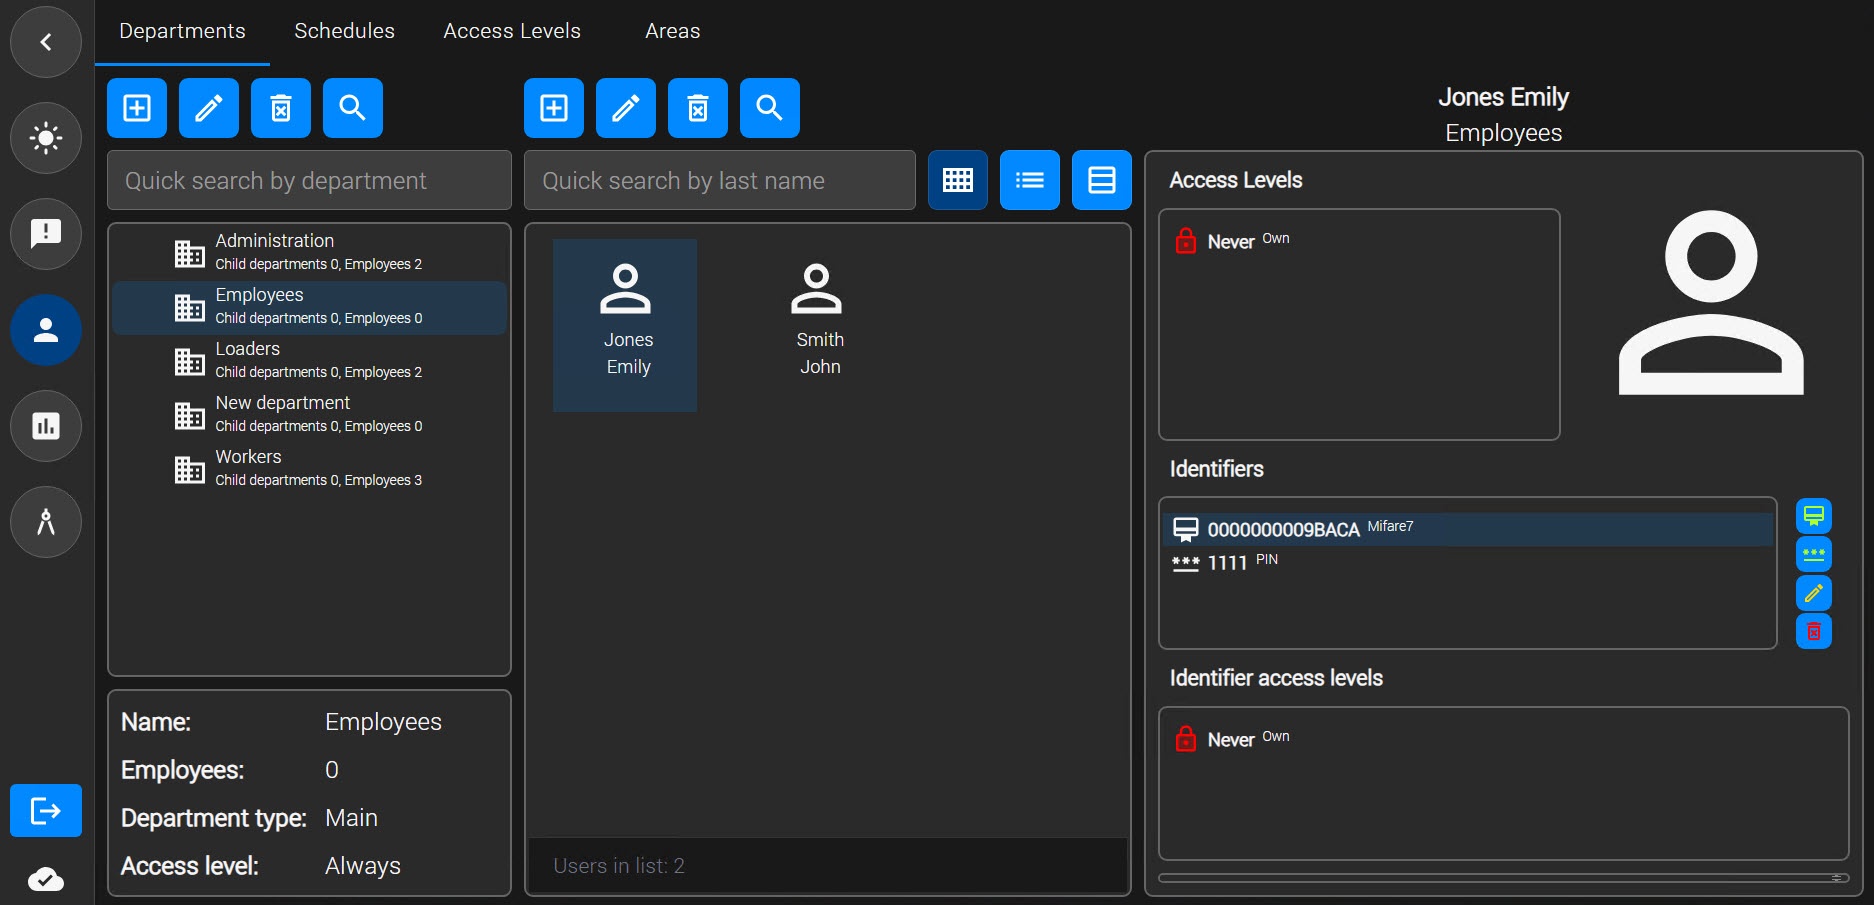
To view a list of users, select one of the departments in the department hierarchy. A list of users included in this department is displayed in the middle part of the Access Manager window.
Note
When the number of users in a department is large (more than 2000), it can take some time to display the list of users, which depends on computer performance.
When you select a user in the list, user properties are displayed in the right part of the Access Manager window. By default, the first user from the list is selected when you view the department.
Create a user
To create a new user:
- Select a department to which you want to add a user.
- Click the
 button above the area of quick search by last name.
 - In the window that opens, change the user parameters specified in the table:
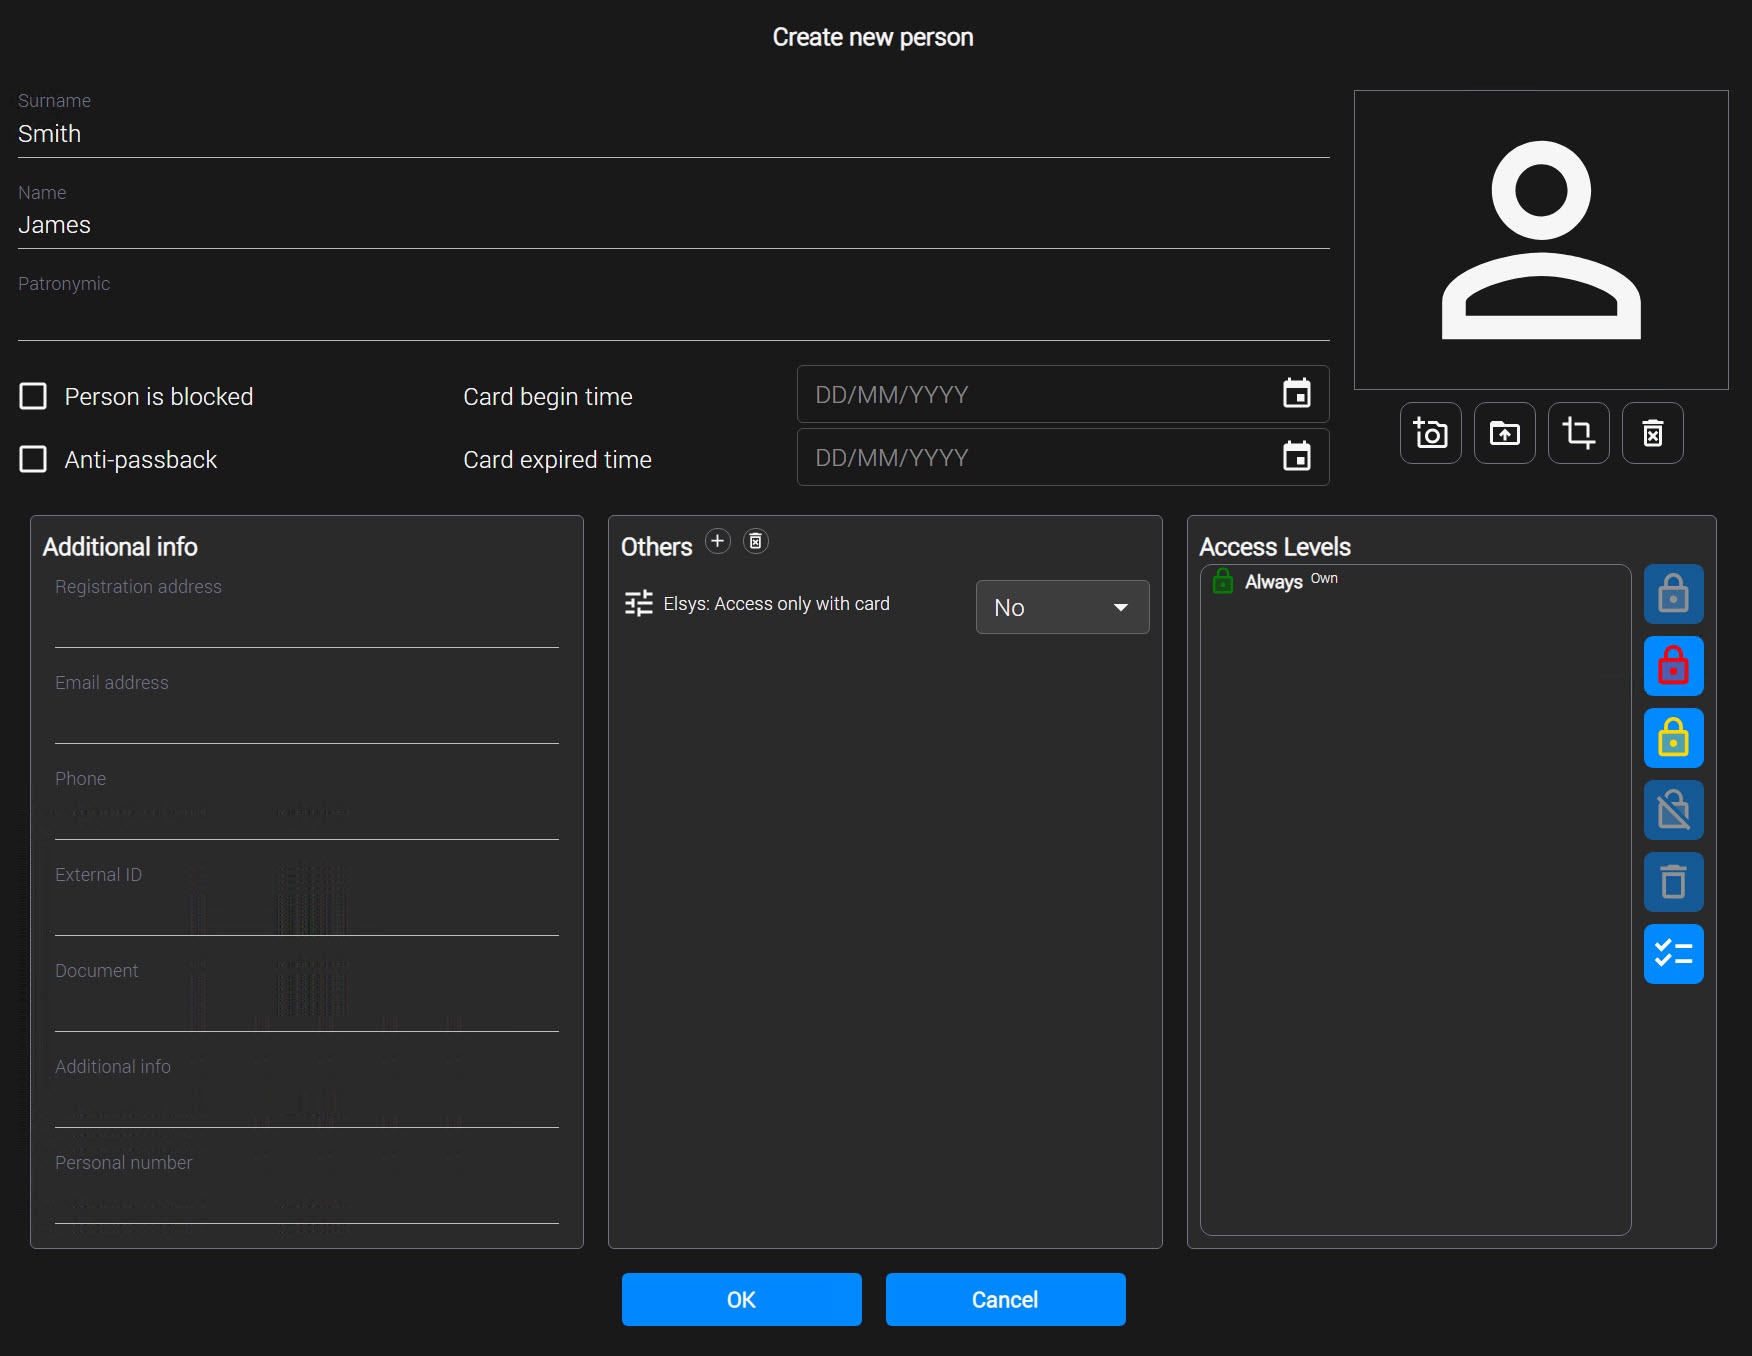
Parameter Value Description Surname Text value
Enter the user's surname, name, and patronymic. Any characters are allowed except the following: <, |, >
Name Patronymic Person is blocked 
By default, the user is active. To block the user, set the checkbox 
Anti-passback By default, passback into the area is allowed. To prevent passback into the area up to exiting the area, set the checkbox Card begin time DD/MM/YYYY Enter the card start date manually or using the calendar. The date must be in the format DD/MM/YYYY Card expired time Enter the card expiration date manually or using the calendar. The date must be in the format DD/MM/YYYY.
If the controller doesn’t support time recording, the card expires at 00:00 on the following day from the specified date
Additional info Registration address Text value Enter the user's address at the place of residence Email address Enter the user's email address Phone Enter the user's phone number. Any characters are allowed except the following: <, |, > External ID Enter the external ID of the user. You can use this field if, due to the specifics of the ACS integration module used, the list of departments and users in the ACFA + Axxon One database is shared with the user database in external software. Any characters are allowed except the following: <, |, > Document Enter the user's identification document. Any characters are allowed except the following: <, |, > Additional info Enter additional information about the user. You can enter the additional information in a text field that expands when you click the "down" button. When you hover the mouse cursor over the user's photo, a pop-up window with the full contents of this field is displayed. Any characters are allowed except the following: <, |, > Personal number Enter the user's personnel number. Any characters are allowed except the following: <, |, > - By default, the user inherits the access level of the department. To change the access level:
- Click the required button in the Access Levels area.
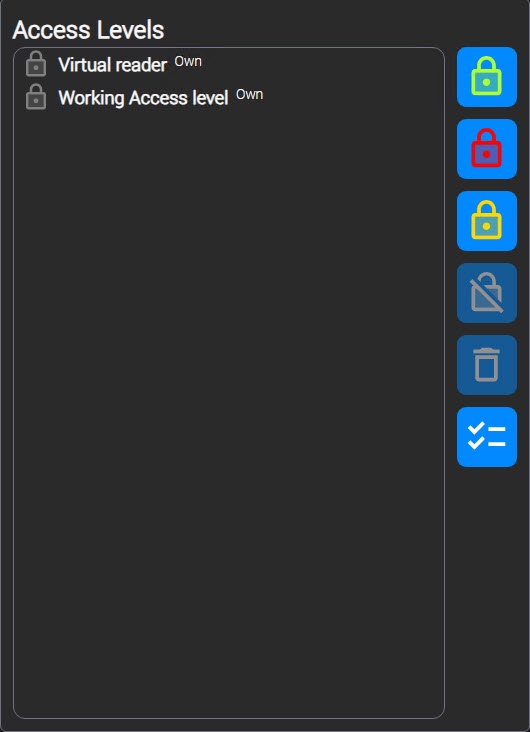
Menu item Description  Set always access level
Assign the Always access level to a user  Set never access level
Assign the Never access level to a user
Note
If you assign the Always or Never access level to a user, then all other access levels are deleted.
 Do not inherit department access levels
Disable the inheritance of a department access level. To return the inheritance of a department access level, in the side menu of the Access Levels area, click the Inherit department access level
 button
 Delete the selected access level
To delete a user access level, right-click the corresponding level and select Delete
Note
If the user has only one user access level, then when you delete it, the department access level is inherited.
 Select access levels
Assign a user access level. The Search Access level window opens, allowing you to select one or more access levels
- Click the required button in the Access Levels area.
- If necessary, you can assign a photo to the user:
- Click the
 button.
 - In the dialog window, select the file with the photo that will be assigned to the user.
Note
You can also take a photo of a user by clicking the
 button and, in the window that opens, clicking the Take photo button.
- Click the
- To delete a photo, click the
 button.
 - If necessary, you can add additional fields by clicking the
 button in the Others area.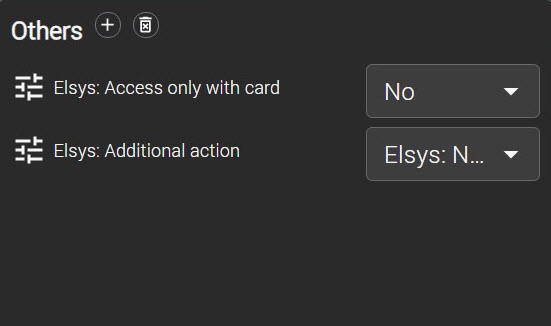
Attention!
The fields available for editing in this area depend on the general settings of the Access Manager module. Depending on the settings, some fields can be hidden or non-editable.
- To save the user and their settings, click the OK button.
The user is created.
Edit a user
You can change user settings in the edit mode. To edit a user:
Select the required department from the list on the Departments tab.
- Double-click the user from the list.
The Edit user window opens. In this window, you can perform the following actions:
- Change user settings.
- Assign or change user access levels.
- Assign or change a user photo.
- Add additional user settings.
- Crop a user photo.
Crop a user photo
In the user edit mode, a tool for cropping a previously uploaded photo is available. To crop a photo:
- Double-click the user from the list.
- In the window that opens, click the
 button below the user's photo. The Crop image window opens.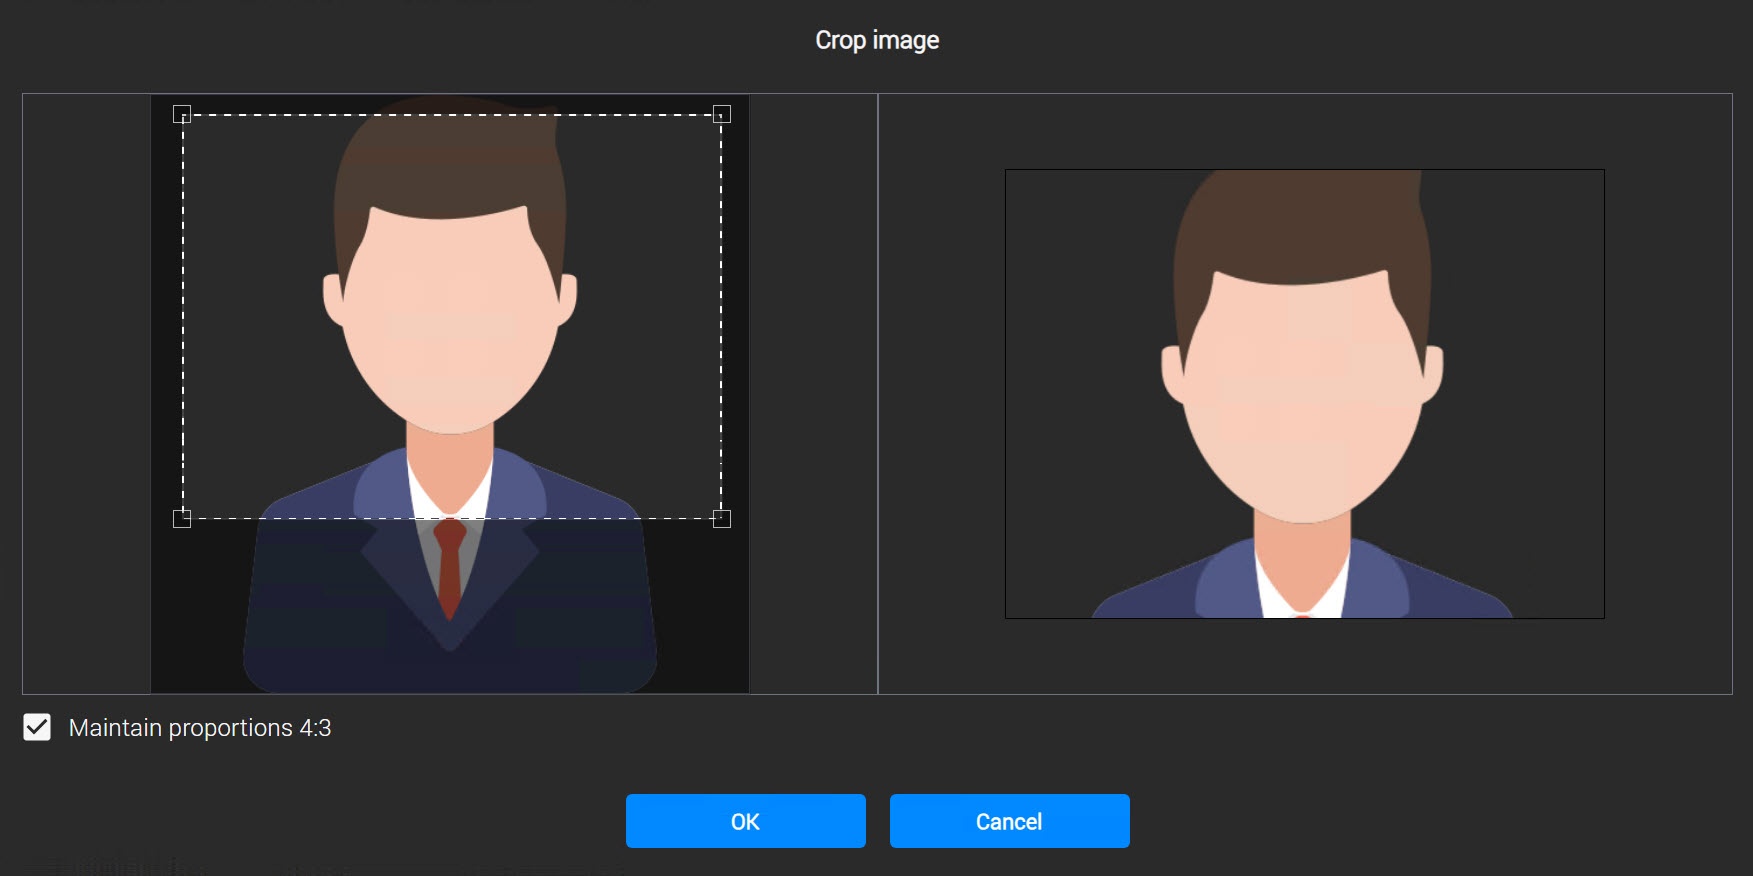
Select the area you want to keep in the photo. To do this, click at the required point and drag a rectangle to select the area. You can move the selected area by holding down the left mouse button on the rectangle.
- By default, the selected image area has a 4:3 aspect ratio. If you don't want to keep this aspect ratio, clear the Maintain proportions 4:3 checkbox.
- To save the changes, click the OK button.
Cropping a user photo is complete.
Add user IDs
Set up a user card
The list of user access cards is displayed in the Identifiers table on the Departments tab.
To set up an access card:
- Go to the list of users of the required department.
- Select the user to whom you want to add a card.
- Right-click in the Identifiers area.
- In the menu that opens, select Create identifier.
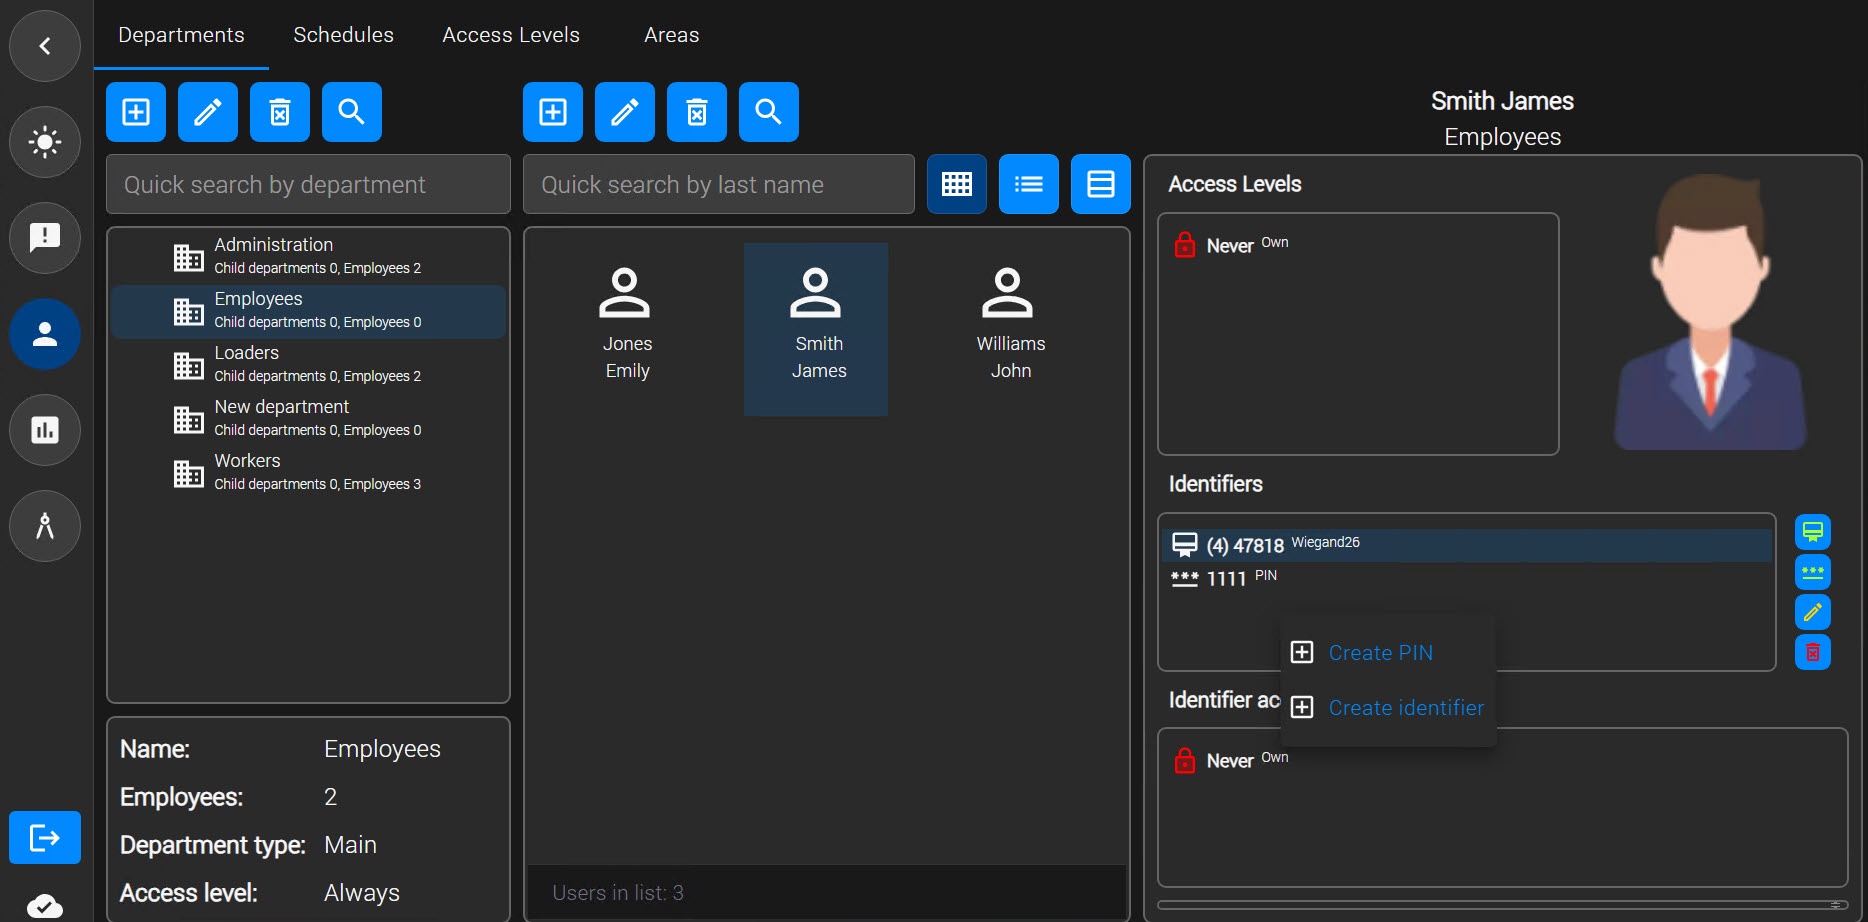
- In the window that opens, in the RFID parameters group, enter the card parameters:
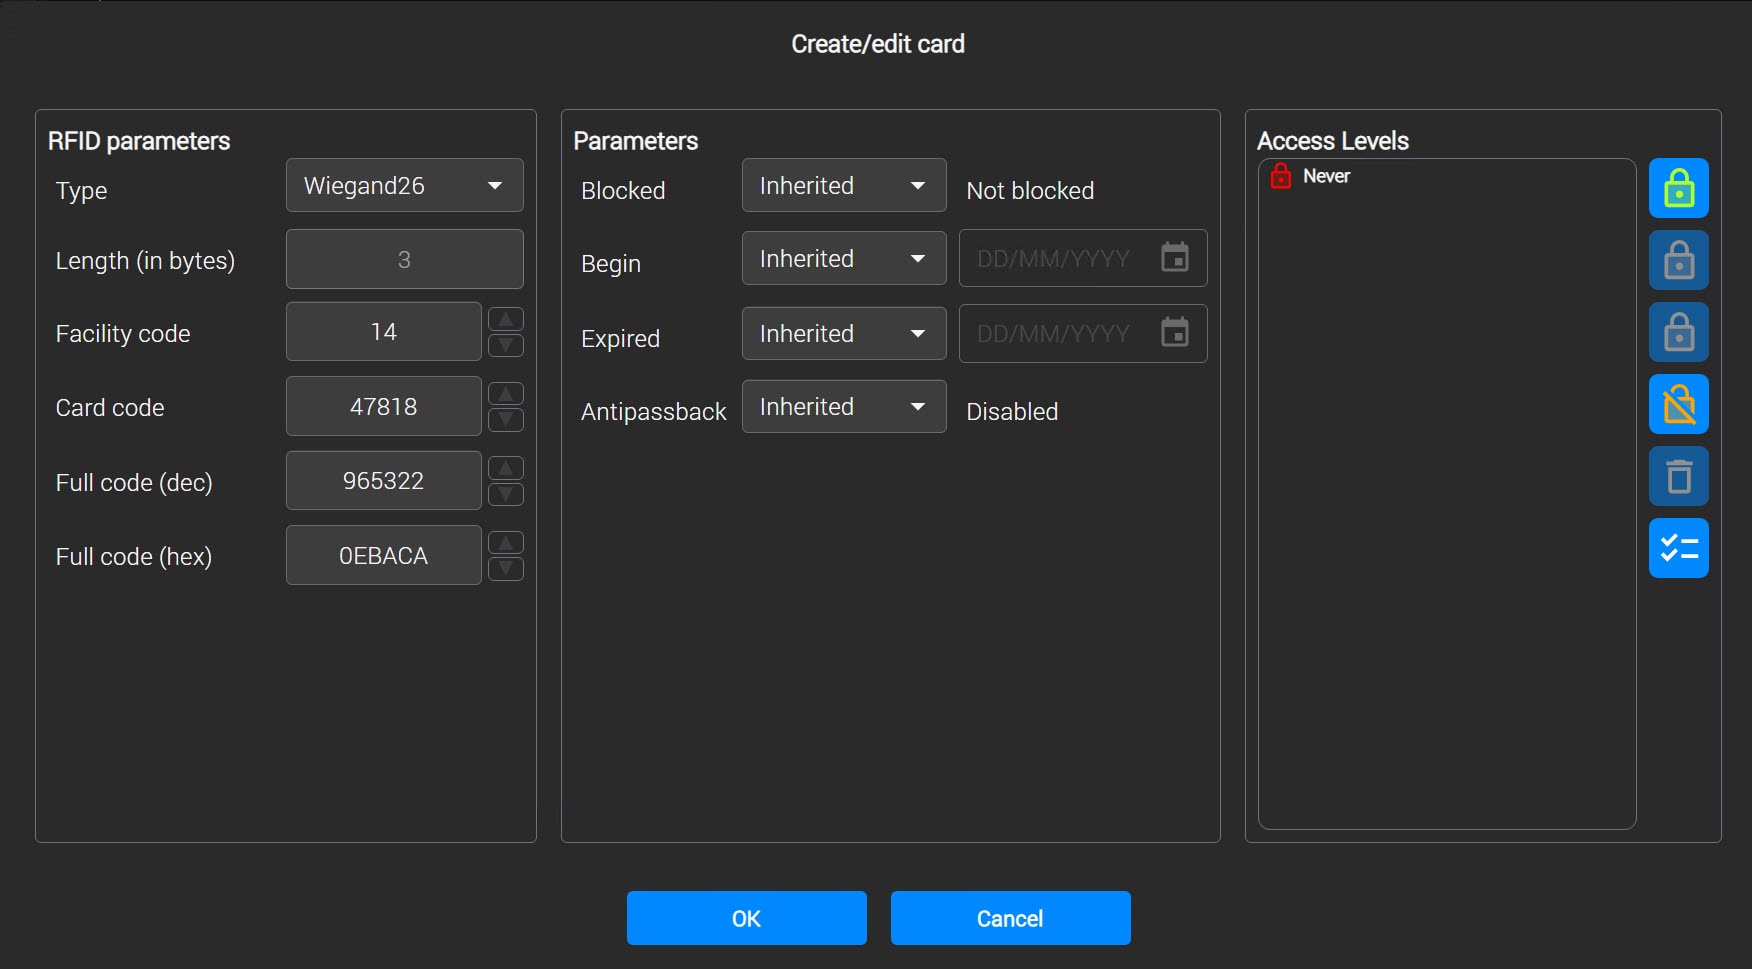
- From the Type drop-down list, select the type of access cards:
Type of card Description Wiegand26 This format allows for
- a 1-byte facility code (from 0 to 255)
- a 2-byte card code (from 0 to 65535)
Wiegand32 This format allows for
- a 2-byte facility code (from 0 to 65535)
- a 2-byte card code (from 0 to 65535)
Mifare (4 bytes UID)
This format allows for a 4-byte (32-bit) card code. This gives a value range from 0 to 4294967295 for the card ID.
It doesn’t allow for a facility code
Mifare (7 bytes UID) This format allows for a 7-byte (56-bit) card code. This gives a value range from 0 to 18014398509481983 for the card ID.
It doesn’t allow for a facility code
Mifare (8 bytes UID) This format doesn’t allow for a facility code. It allows for an 8-byte (from 0 to 4294967295) card code.
This format allows for an 8-byte (64-bit) card code. This gives a value range from 0 to 18446744073709551615 for the card ID
TouchMemory This format doesn’t allow for a facility code. It allows for an 8-byte card code. The format is hexadecimal, and the characters A, B, C, D, E, and F are allowed. You cannot enter fewer than 8 characters. If you enter a card code that is fewer than 8 characters long, the higher-order digits are filled with zeros - In the Facility code field, enter the facility code.
- In the Card code field, enter the card code.
- In the Full code (dec) field, enter the full card code in decimal format if necessary. This format is used to identify the card in systems that use decimal encoding.
In the Full сode (hex) field, enter the full card code in hexadecimal format. This format is used for display or integration with systems that use the hex format.
- From the Type drop-down list, select the type of access cards:
- In the Parameters group, enter additional card parameters if necessary:
Parameter Value Description Blocked
Determines the block state of the access card Inherited The default value. The value inherited from the parent object is used Blocked The card is blocked and cannot be used for access
Not blocked The card is active and can be used for access Begin Sets the date and time the card starts to be valid Inherited The default value. The start date and time are inherited from the parent settings Own A custom value is used. When you select this value, a checkbox for selecting the card validity date and time becomes available Expired Sets the card expiration date and time Inherited The default value. The expiration date and time are inherited from the parent settings Own A custom value is used. When you select this value, a checkbox for selecting the card validity date and time becomes available.
Antipassback Determines if the antipassback mechanism is used for the card Inherited The default value. The antipassback setting is inherited from the parent object Used Antipassback is enabled; re-entering without a correct exit is prohibited Not used Antipassback is disabled - If necessary, change the access level of the user card.
- Click the OK button to save the settings.
The setup of the user card is complete. The added card is displayed in the Identifiers area of the user profile.
Set up a user PIN code
To set up a user PIN code:
- Go to the list of users of the required department.
- Select the user for whom you want to add a PIN code.
- Right-click in the Identifiers area.
- In the menu that opens, select Create PIN.
- In the window that opens, enter the required PIN code.
Click the OK button to save the settings.
The setup of the PIN code is complete. The PIN code is displayed in the IDs area of the user profile.