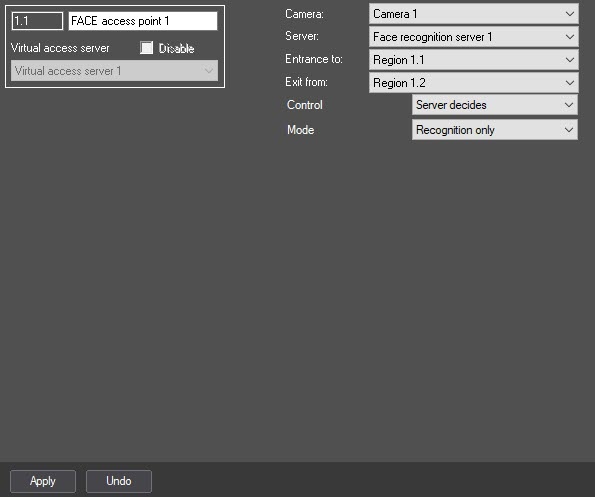


- Server decides—server makes the decision to grant or deny access (this includes the use of scripts).
- Operator decides—operator makes the decision to grant or deny access using the Event Manager module (see Working with the Event manager module). If you select this mode, the following settings become available:

- Timeout—sets the time interval in seconds to wait for access confirmation by the operator. All other requests from the Face recognition server are ignored within the specified timeout.
- Recognition only—server makes the decision to grant or deny access based only on face recognition.
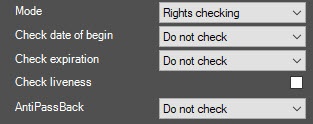
- Rights checking—server makes the decision to grant or deny access after successful face recognition and successful verification of user access rights (access level, time zones, blocking, antipassback). If you select this mode, the following settings become available:

Check date of begin and Check expiration—sets the mode of checking the access card validity:
Do not check—do not check the start or expiration date of the card.
Do not include—do not include the start or expiration date of the card in the check.
Include—include the start or expiration date of the card in the check.
- Check liveness—set the checkbox to control if a photo is presented instead of a live person. By default, the checkbox is clear.
- AntiPassBack—select the antipassback control mode from the drop-down list:
- Do not check—antipassback control is disabled.
- Strict—antipassback control is enabled, that is, when a person accesses through one access point more that once, an access event isn't generated and access is denied.
- Timed—antipassback control is enabled for the time period specified in the APB Timeout field.

- APB Timeout—sets the time interval in HH:MM:SS format, during which the antipassback control is enabled.
- Soft—a person can access, but a note is made in the access event that a person accessed with a violation (repeated access).
- Temperature monitoring—if it is required to only monitor the face temperature (see Face temperature monitoring and control).
- Temperature control—if it is required to only control if the face temperature threshold is exceeded (see Face temperature monitoring and control). If you select this mode, the following settings become available:

- Lock user on temp. alarm—set the checkbox if you want to automatically block the user when the temperature is exceeded (the User blocked – Yes parameter is set in the Access Manager module). If the joint operation with the ACS and dynamics are enabled, then such a user is automatically removed from the controller and therefore access is denied.