


On the page:
General information
The Template Editor tab is used to create, edit, save, and preview access card templates. Templates are saved in JSON format.
Templates can include static elements, images, barcodes, buttons, data from the Access Manager database, employee photos, and camera images.
Create a template
To create a template:
- Click the
 button in the side menu of the Access Manager.
 - In the window that opens, click the Editor
 button. The template creation window opens.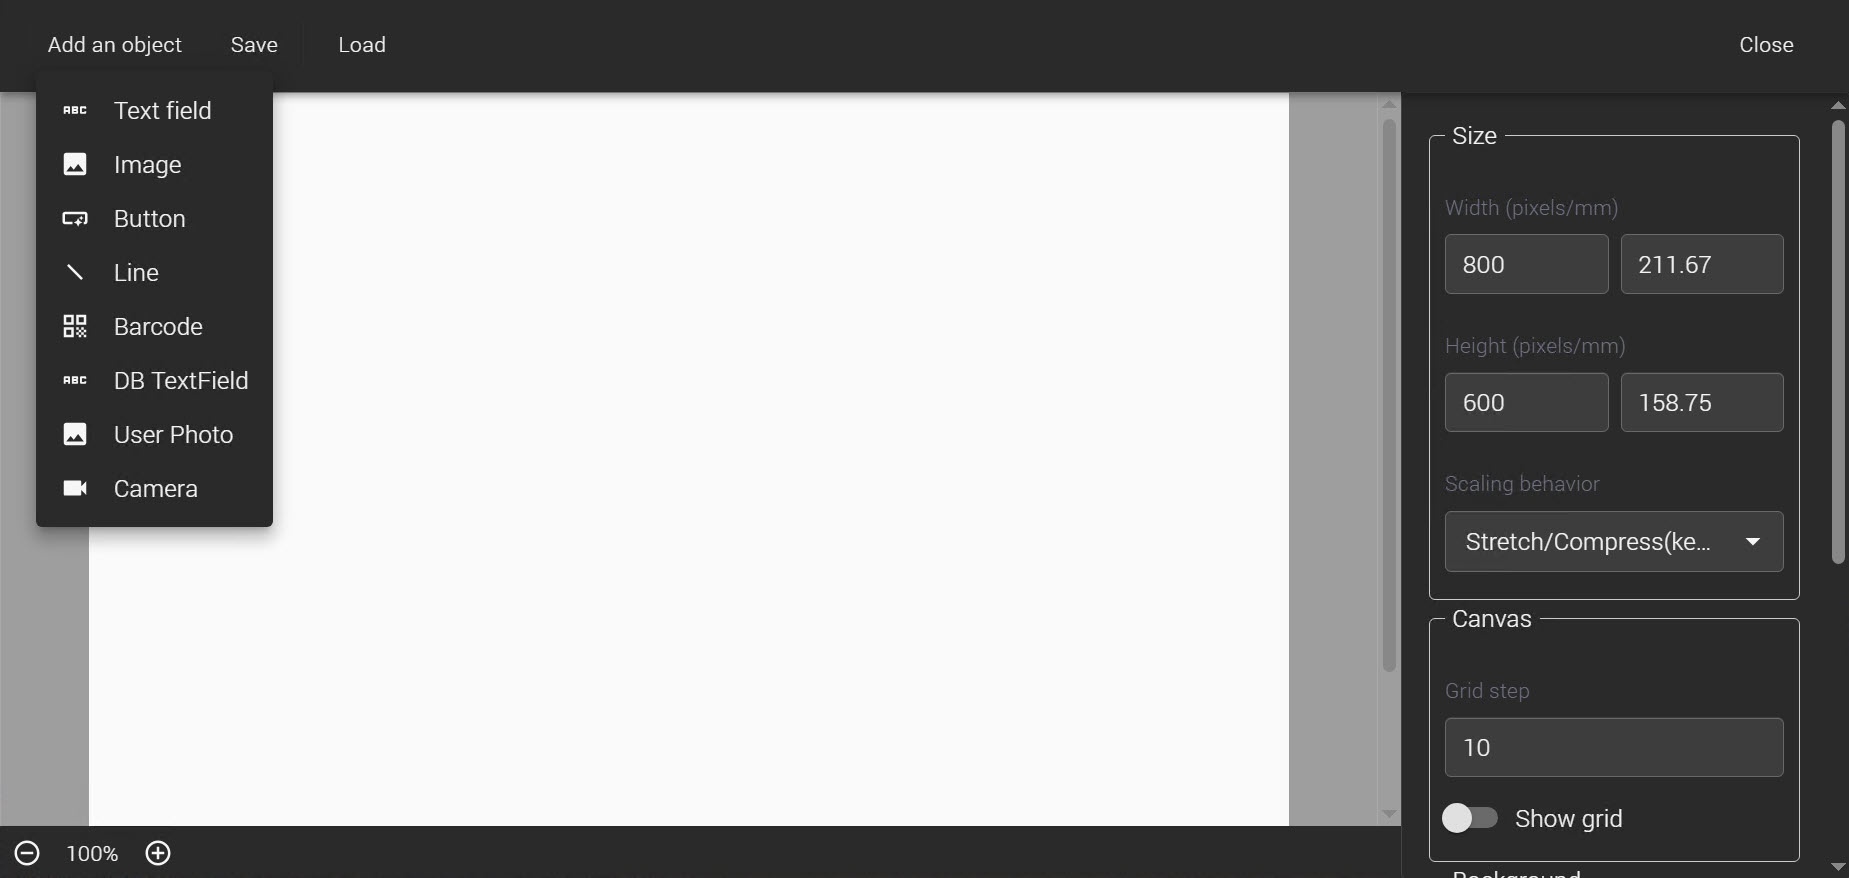
- If necessary, adjust canvas settings in the right sidebar. The following settings are available:
- Width—width of a template in pixels and millimeters.
- Height—height of a template in pixels and millimeters.
- Scaling behavior—the way a template resizes when scaled.
- Grid step—the distance between grid lines.
- Show grid—show or hide the grid on the workspace.
- Background—the background color of a template.
- Background image—the image used as the background.
- Background image size—the way the background image is displayed on the canvas.
- To select a background image, use the Select image button. The maximum file size is 1 MB.
- Add the required objects to the template by clicking the Add an object button. The following object types are available:
- Text field—add custom text to the template.
- Image—add a static image.
- Button—add a button used in a template.
- Line—add a line to visually separate elements.
- Barcode—add a barcode.
- DB TextField—add a field from the Access Manager database. For example, full name, department name, job title, ID, or other available information.
- User Photo—add a photo of the selected employee.
- Camera—add an area for working with the camera image.
- Configure the position, size, and appearance of objects. The following groups of settings can be available for an object:
- Alignment—the position of an object on the canvas.
- Size—the width and height of an object.
- Border—the settings of an object border.
- Color—the color of fill, text, or line.
- Font—the text size, style, and display options.
- Data source—a database field, employee photo, or other data source.
- To create a copy of an object, select the required object in the workspace and click the Clone selected button in the top bar of the workspace. Next, move the copied object to the required area of the template.
- If you want to delete an object, click the Delete selected button in the top bar of the workspace.
- To save the template, click the Save button. The template is saved in JSON format.
Preview a template
You can preview a template to check the display of the template with real data from the Access Manager module.
To preview a template:
- Click the button in the side menu of the Access Manager.
- In the Preview configuration area, specify the parameters for the template preview:
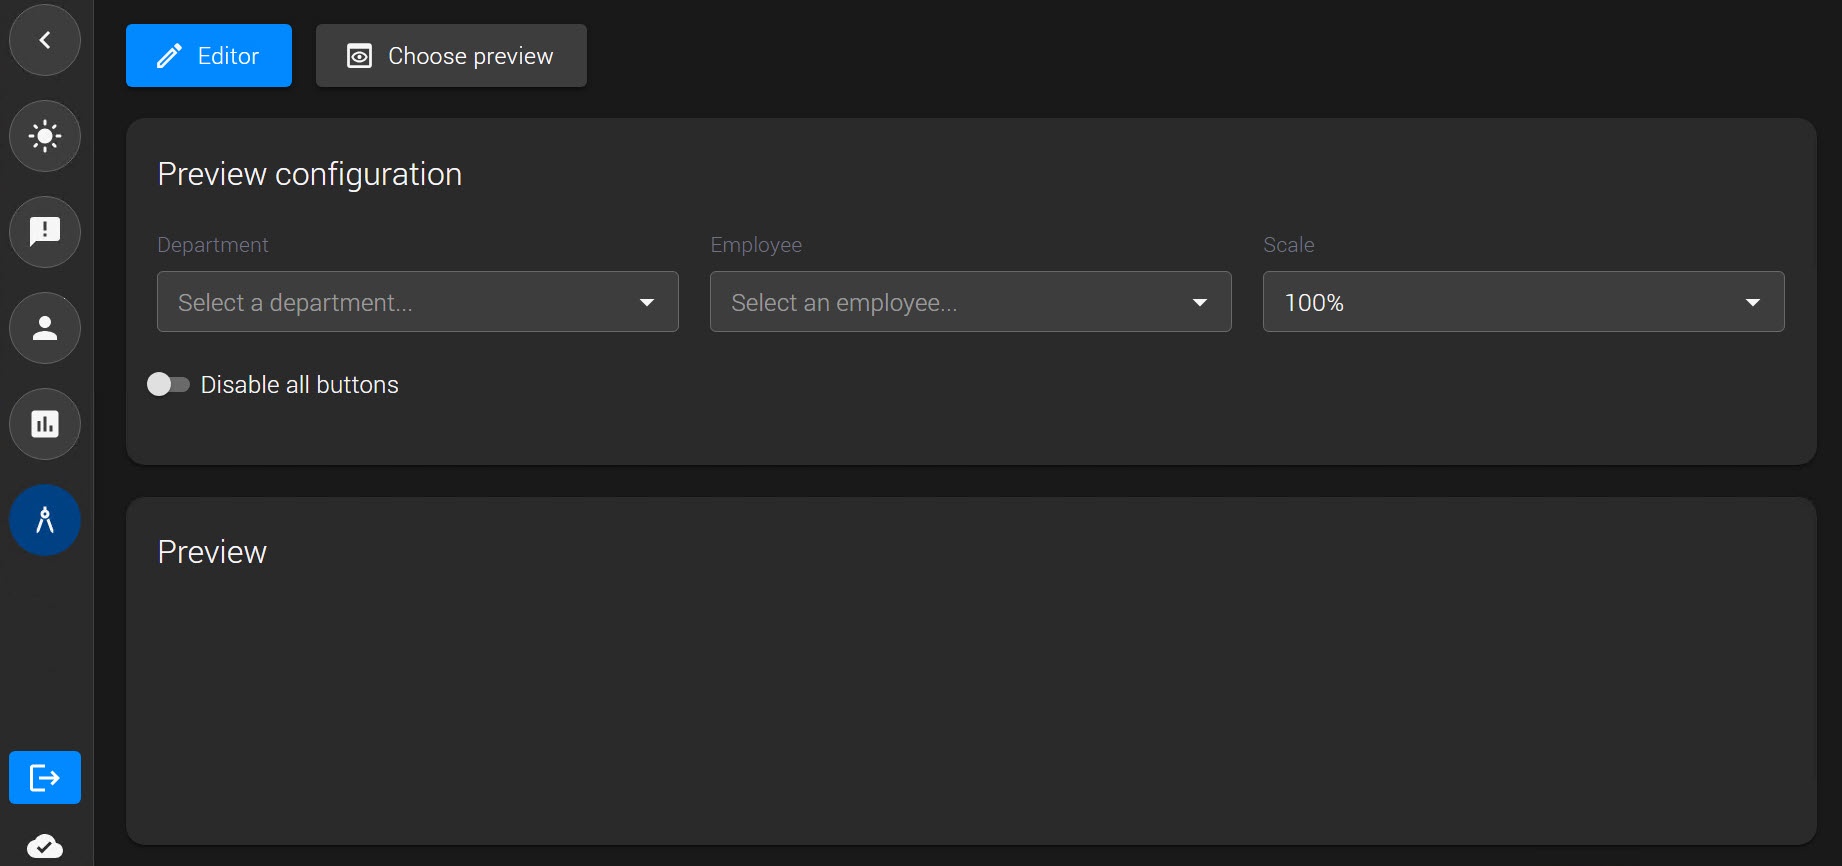
- Department—the department from which an employee is selected.
- Employee—the employee whose data is used to fill out the template.
- Scale—the display scale of a template in the Preview area.
- Disable all buttons—lock interactive buttons in the preview mode.
- Click the Choose preview
 button.
 - In the window that opens, select the required template in JSON format.
As a result, the Preview area displays a template with the data of the selected employee. The photo, full name, department name, and other information can be displayed, depending on the template settings.
Overview
Content Tools