Documentation for DetectorPack PSIM 1.0.1.

Previous page Camera requirements for the Detection of light indication control module  VI detection of crowd Next page

On the page:

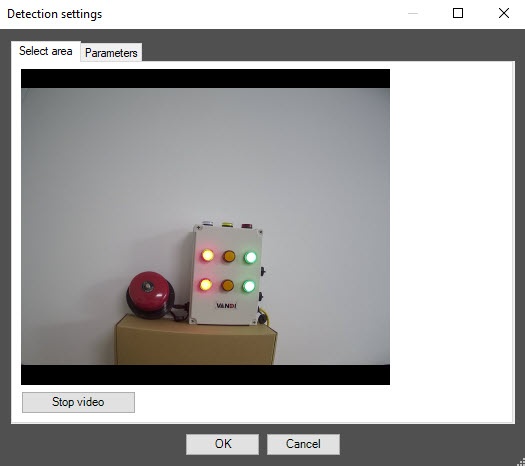
The Detection of light indication control module registers turning on and off of light indication in the camera FOV. 

Configuration of the Detection of light indication control module includes: selection of detection areas, specifying the parameters of the detection tool.

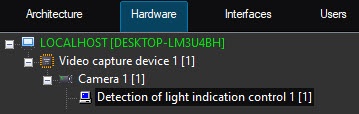
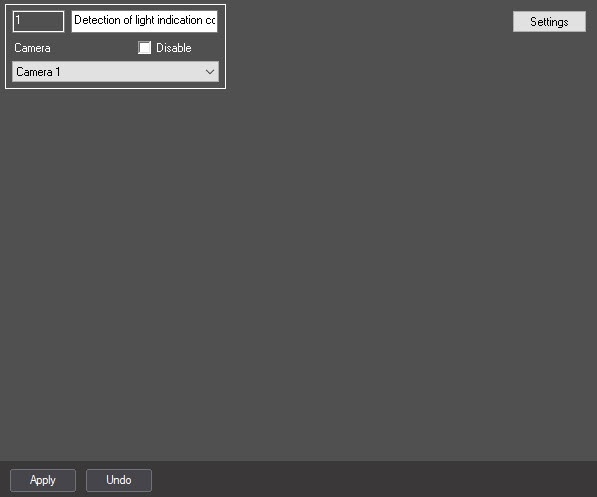
You can configure the Detection of light indication control module on the settings panel of the Detection of light indication control object that is created on the basis of the Camera object on the Hardware tab of the System settings dialog window.

Selecting detection areas

  1. Go to the settings panel of the Detection of light indication control object.
  2. Click the Settings button. The Detection settings window opens.
  3. In the Detection settings window, click the Stop video button to pause the playback and capture the video image.
  4. On the video image, specify the location of the light sources that you want to monitor with the detection tool. For this, on the captured video image, specify the detection areas by clicking in the frame and stretching the bounding box to the required size. The detection areas are numbered in the order of creation, starting from 1. When you add an area, the button corresponding to this area is displayed to the right of the video image.

Note

  1. The number of detection areas is unlimited.
  2. You can change the size and position of detection areas by moving their borders with the mouse. 
  3. Note that changes in local illumination and reflective surfaces near lamps that are in the detection area can cause false triggering of the detection tool.
  4. To correctly specify a detection area, you must include in it a small part of the area near the light source.
  5. To change the borders of a detection area, activate it by clicking the button with its number in the list of areas (the button will change its color to blue) and resize the area on the video image.
  6. To delete an area, click the button to the right of the area number.

Parameters of the detection tool

  1. Go to the Parameters tab.
  2. In the Sensitivity field, specify the sensitivity of the detection tool to the change of the video image in the range from 0 to 100. You must select the optimal value experimentally by testing detection on triggering in the required conditions. The higher the sensitivity, the higher the probability of false triggering. The lower the sensitivity, the greater the probability of missing an event. The default value is 85.
  3. In the Brightness sensitivity field, specify the sensitivity of the detection tool to the change of the light source state. The default value is 240. You must select the optimal value experimentally by testing detection on triggering in the required conditions. For a dim light source, we recommend increasing the value of the parameter.
  4. In the Time between measurements (ms) field, specify in milliseconds the time interval between two measurements of light indication. The default value is 1000
  5. Click the OK button to save the changes and close the Detection settings window.
  6. On the settings panel of the Detection of light indication control object, click the Apply button to save the changes

Configuring the Detection of light indication control module is complete.

  • No labels