
Go to documentation repository
Documentation for Monitoring PSIM 1.0 (english)
Previous page
![]()
![]() Next page
Next page
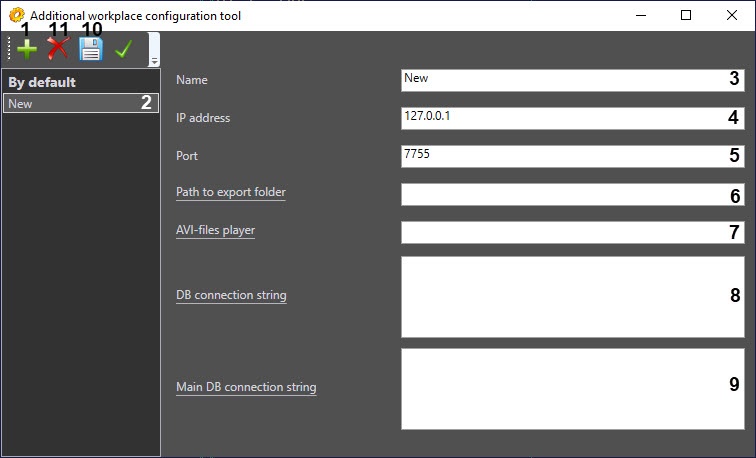
By default the Server (named “By default”) is added to Additional workplace configuration right after installation of Monitoring PSIM software package. Its settings are the same as those specified during installation (see Additional workplace installation section).
Add a new Server to the list as follows:
- Run Additional workplace configuration tool.
- Click the
 button (1).
 - A new Server named New is added to the list (2).
Rename the Server if necessary (3).
Note.
This name is used in the Additional workplace configuration tool only.- Specify the IP address of computer where the corresponding communication module is run: VideoSrv.exe module (if the Server of Control is added) or CentralNetServer.exe (if the Central Server of Control is added) (4).
Specify the connection port to the VideoSrv.exe/CentralNetServer.exe module (5).
Note.
To connect to the VideoSrv.exe module, it is necessary to specify the port that is selected in the TCP/IP port (Archive) field on the settings panel (see Configuring a connection).
To connect to the CentralNetServer.exe module, it is necessary to specify the port that is selected in the IPPort registry key (see Registry keys reference guide).
Specify the path to network folder on the Server where there are archive files requested from the Agent of Control (6) (see Specifying the export directory). A standard Browse for Folder dialog box appears when clicking the Path to export folder link. Select a required folder.
- Specify the path to the executable file of the video player on the Additional workplace/Additional workplace of CSC used to playback the video clips requested from the Agents of Control (see Request for video clips from objects) (7).
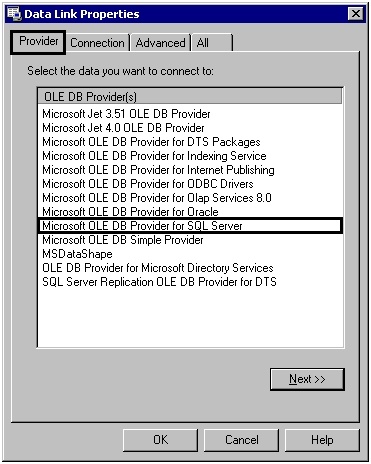
- Click the DB connection string link (8). The Data Link Properties box appears. Configure DB connection to remote Server as follows:
- Go to the Provider tab. Select Microsoft OLE DB Provider for SQL Server.
- Go to the Connection tab.

- In the 1. Select or enter a server name: dropdown list select a name of DB server where the Server DB is stored (1).
- Set the 2.Enter information to log on to the sever: to the Use a specific user name and password: position and specify the user name and password to connect to MS SQL Server (2).
- Select the Allow saving password check box (3).
- In the Select the database on the server: dropdown list select the name of the Server DB (4).
Click the Test Connection button (5). If connection data is specified correctly, then the box with the Test connection succeeded message appears.

Note.
If there is the Connection failed message, then check if there is connection to the Server computer and if the server DB is configured correctly and then repeat steps 9.a-9.g.- Click the OK button (6).
- Go to the Provider tab. Select Microsoft OLE DB Provider for SQL Server.
- The configured connection string is displayed in the text field (8).
- Click the Main DB connection string link (9). The Data Link Properties box appears. Configure DB connection to the base Axxon PSIM DB similarly to the Server (see steps 9.a-9.h). The configured connection string is displayed in the text field.
- Click the
 button to save the changes (10).
Note.
To remove the Server from the list, select it and click the  button (11).
button (11).Server is now added to the list.
Overview
Content Tools