Go to documentation repository
Documentation for WEB Report System PSIM 1.0.1.
Previous page Next page
To create a Change person protocol report, do the following:
Select the Change person protocol report from General reports (see Selecting the type of general report). A window for specifying the report parameters will be displayed.
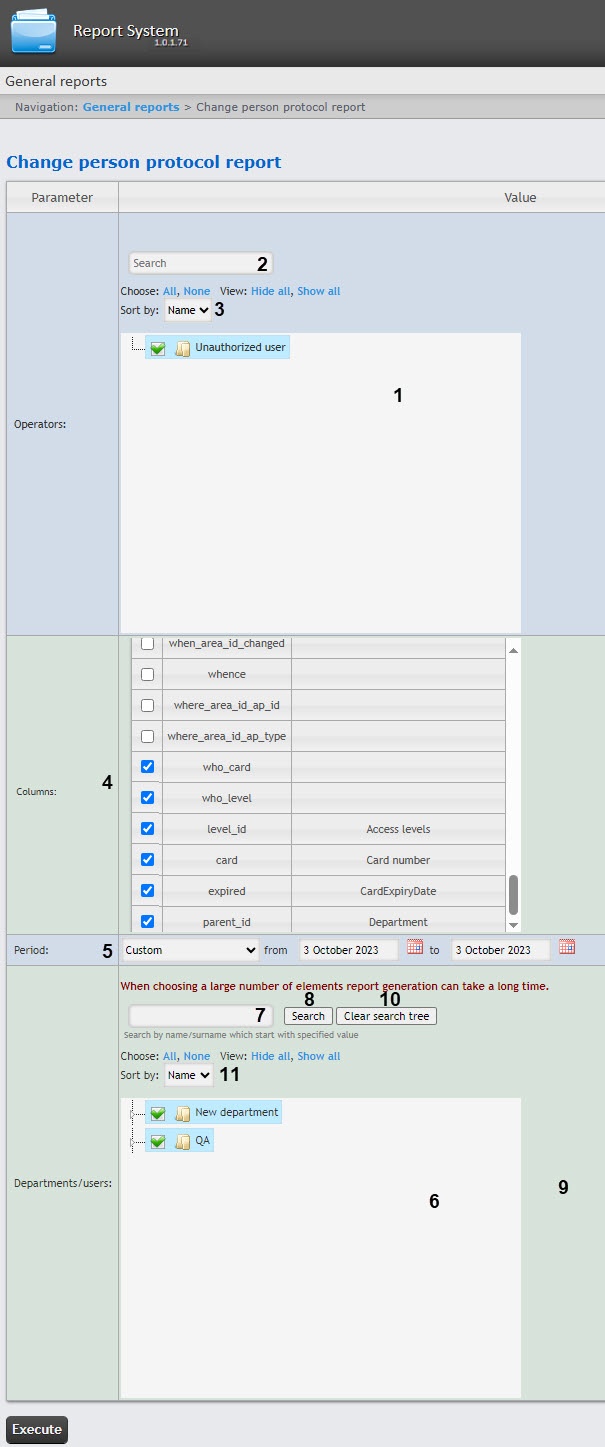
- In the Operators field (1), set the checkboxes next to the users who were assigned the rights to make changes. To select all found operators, click All, to deselect, click None. To expand the operator structure, click Show all, to hide the operator structure, click Hide all.
You can find an operator using the search (2). The search starts from the first character, the result is highlighted in a different color.
- By default, the list of operators is sorted by name. To sort by number, select this option from the Sort by drop-down list (3).
- In the Columns table, determine which fields will be included in the report (will become columns of the report table) and what they will be called. Use the checkboxes in the Parameter column to select the fields that you want to include in the report. The maximum number of columns in the report is six. In the Value column, you can enter the name of the field that will be displayed in the report. If the user hasn’t entered a name and the line is left blank, the report will display the name of the field from the database (4).
- From the Period drop-down list (5), select the time period to create the report. If you select the Custom or Custom 2 period, enter the date of start and end periods for which the report must be created in the from and to fields using the Calendar tool. Click the button near the corresponding field to use the Calendar tool. If you select Custom 2 period, enter the time of start and end periods for which the report must be created using the button.
- In the Departments/users field (6), set the checkboxes next to the departments or employees, the information about which you want to be displayed in the report. To select all found employees and departments, click All, to deselect, click None. To expand the structure of departments, click Show all, to hide the structure of departments, click Hide all.
- You can find an employee by name or surname using the search. To do it, enter at least 4 first characters of the employee's first name or surname in the search field (7) and click the Search button (8). The department to which the found employee belongs will be displayed in the search tree in the area 9. To clear the search field and the search tree, click the Clear search tree button (10).
- By default, the list of employees is sorted by name. To sort by number, select this option from the Sort by drop-down list (11).
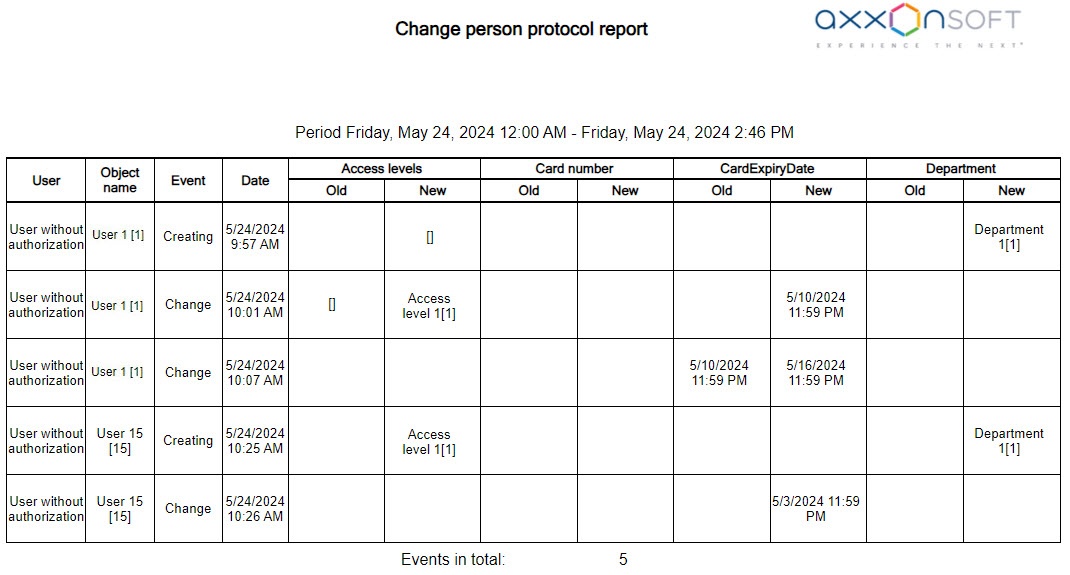
- To create the report, click the Execute button. The report with the specified parameters will be displayed.
Overview
Content Tools


