Documentation for WEB Report System PSIM 1.0.1.

Previous page Next page

This report shows which operators assigned which statuses to the POS events. To create the report by operator:

Attention!

In order to create the report by POS operator, you must first create and configure the POS terminal object in the POS PSIM (see The POS terminal object setup).

To configure the list of POS operators, see Creating the list of POS operators.

Note

You can use templates when you create a report.

To add a new template, click Report templates New template and fill in the Name and Description fields. The template will use the selected parameters of the current report.

Templates work the same way as templates in the scheduler and can be used interchangeably.

When you create a response using a template, click Report templates at the top of the page and select the required template from the list of saved templates (the required template is highlighted). As a result, the parameters of the current report are updated according to the selected template.
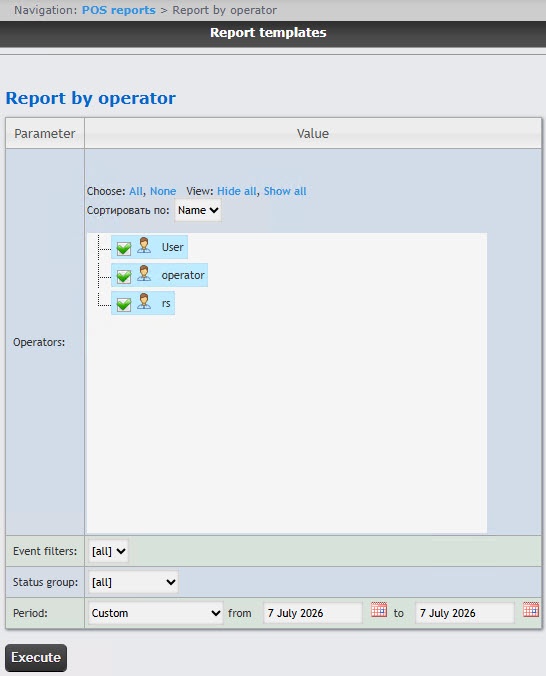
  1. Select the Report by operator (see Select the type of general POS report).
  2. Select the POS operators who you want to include in the report by setting the corresponding checkboxes in the Operators list. Click All to select all operators from the list. Click None to deselect. Click Show all to expand the operator structure. Click Hide all to hide the operator structure.
  3. To use the search when selecting POS operators, start entering the POS operator's last name in the search field. The search works from the first character. The results are highlighted in a different color.
  4. By default, the list of operators is sorted by name. To sort by number, select this option from the Sort by drop-down list.
  5. From the Event filters drop-down list, select an event filter that must be used to generate the report. If All is selected, then event filters are not considered, and the report is created by all events.
  6. From the Status group drop-down list, select the status group of those events that must be displayed in the report. If All is selected, the report will include all POS events regardless of their status.
  7. From the Period drop-down list, select the time period for which the report must be created.
    1. If you select the Custom period, enter the dates of the start and end periods for which the report must be created in the from and to fields using the Calendar tool.
  8. Click the Execute button.

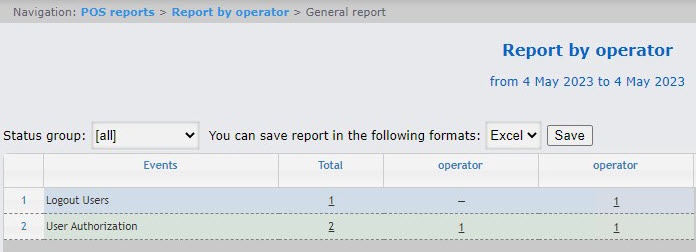
Example of a report by operator:

This is a summary table of events by the POS operators. The Total column displays the total number of events for each type of event. The column called by the POS operator name displays the number of events by their type processed by that operator (changed the status).

In order to save the general report by operator in .xls format, click the Save button.