
Go to documentation repository
Previous page Next page
The Face recognition report allows you to receive the data on recognized/unrecognized faces from Face PSIM for a certain time period. The data are presented in the form of a table.
Note
The Face recognition report is a part of the Face characteristics recognition channel module and Face recognition server module. It is necessary to create and configure the corresponding objects in Face PSIM (see Face PSIM configuration and setup procedure).
Note
You can use templates when you create a report.
To add a new template, click Report templates → New template and fill in the Name and Description fields. The template will use the selected parameters of the current report.
Templates work the same way as templates in the scheduler and can be used interchangeably.
When you create a response using a template, click Report templates at the top of the page and select the required template from the list of saved templates (the required template is highlighted). As a result, the parameters of the current report are updated according to the selected template.
To create the report, select the Face recognition report from the list of Visitors counting detectors reports (see Select the type of Visitors counting detectors reports) and specify the report parameters in the form that opens.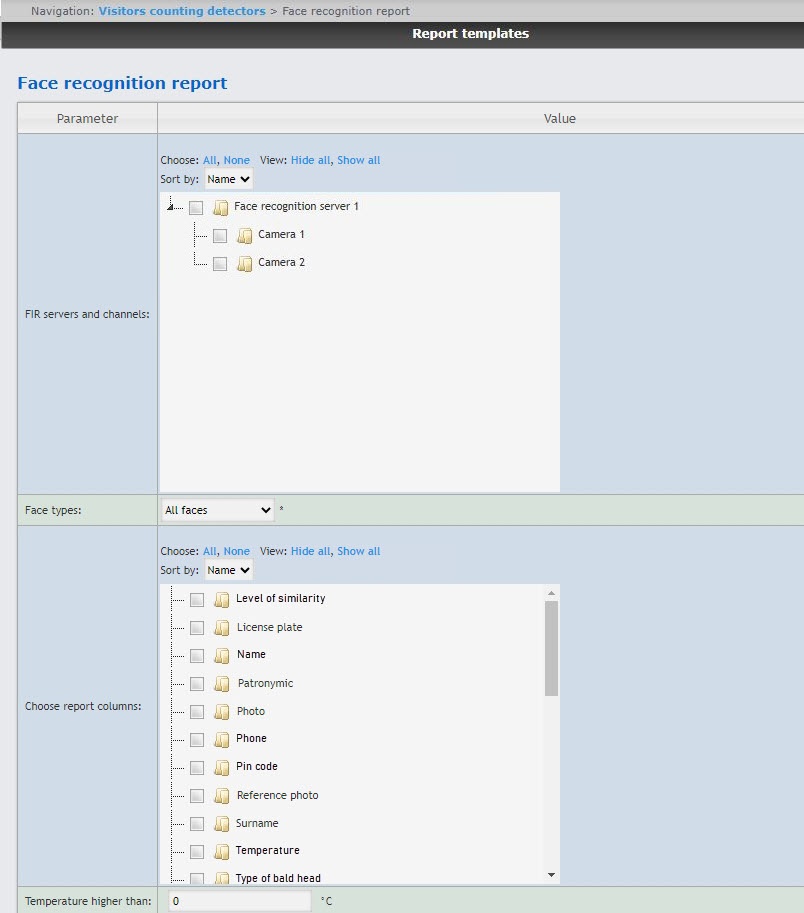
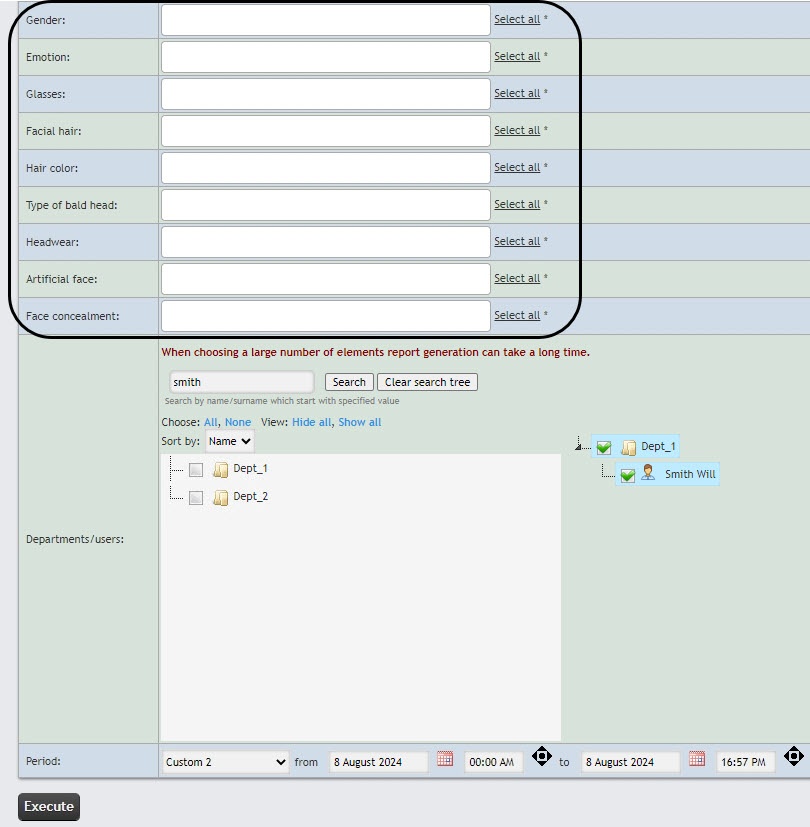
From the Face types drop-down list, select the face types whose information must be displayed in the report:
All faces
Only unrecognized
Only recognized.
In the Period fields, select the time period for which you want to generate the report.
Example of a face recognition report.
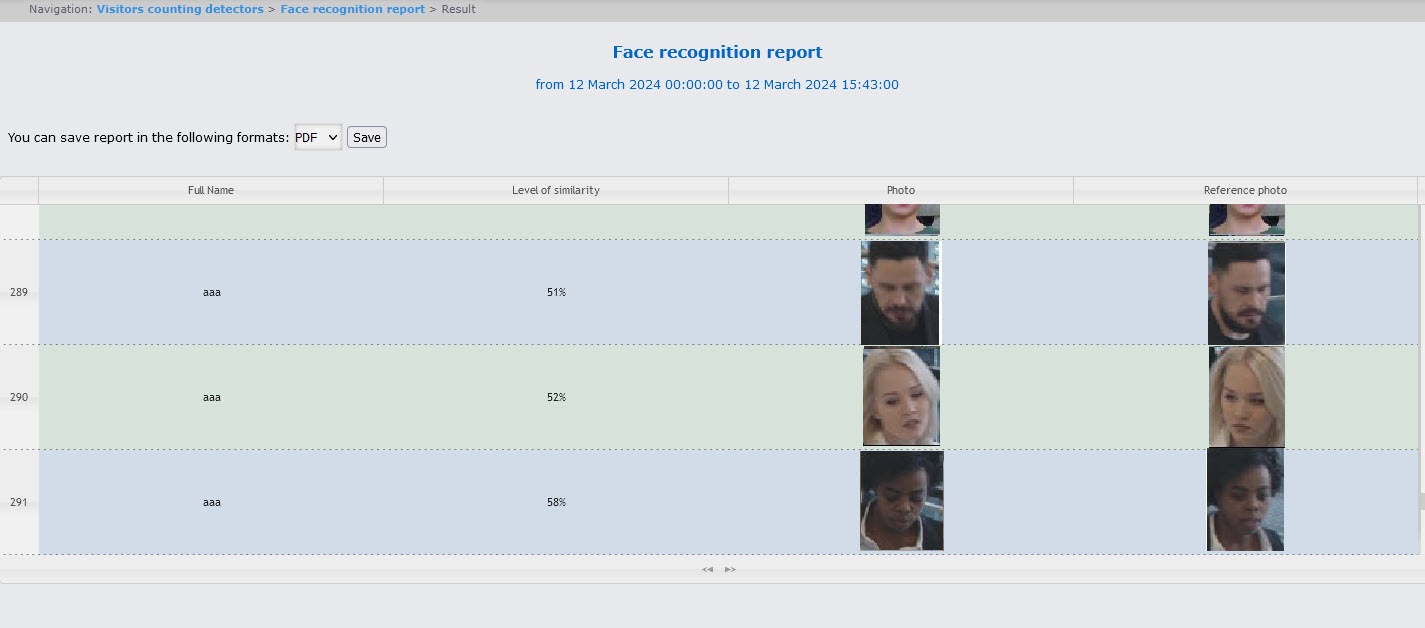
All possible fields of the report are described in the table.
| Field name | Description |
|---|---|
| Photo | Photo from the camera |
| Reference photo | Employee's photo from the Face PSIM database |
| Date and time | Date and time of employee's face recognition |
| Full Name | Employee's full name |
| Name | Employee's first name |
| Surname | Employee's last name |
| Patronymic | Employee's patronymic |
| Level of similarity | Level of similarity of the captured face with a reference photo in percent if the face is recognized. A dash is displayed for unrecognized faces |
| License plate | License plate of employee's car |
| Camera | Name of the camera that captured the employee's face |
| Car | Brand of employee's car |
| Card number | Number of employee's access card |
| Card code | Code of employee's access card |
| Date of card issue | Issue date of employee's access card |
| Access levels | Employee's access level |
| Phone | Employee's phone number |
| Company/Department | Company/Department where the employee works |
| Department | Department to which the employee belongs |
| Comment | Comment |
| Card expiration date | Expiration date of employee's access card |
| Pin code | PIN code of employee's access card |
| Temperature | Employee's face temperature in degrees Celsius |
| Gender | Employee's gender |
Emotion | Employee's emotion |
Glasses | Glasses on face |
Facial hair | Facial hair |
Hair color | Hair color |
Type of bald head | Type of bald head |
Headwear | Headwear |
Artificial face | Artificial face |
| Face concealment | Face concealment |
Note
The number of entries in the report is unlimited.
You can use forward and rewind buttons to view the contents of the report.
When you save the default result, it is split into files of 1000 entries each. You can change the number of entries in one document in the Web.config file by specifying a new value for the FaceRecognizedMaxRows key (see Configuring the number of entries in a file of the Face recognition report).
To save the report to a file, select the format and click the Save button. You can save the report in the following formats:
The Face recognition report is created.

