
Go to documentation repository
Previous page Next page
Note
You can use templates when you create a report.
To add a new template, click Report templates → New template and fill in the Name and Description fields. The template will use the selected parameters of the current report.
Templates work the same way as templates in the scheduler and can be used interchangeably.
When you create a response using a template, click Report templates at the top of the page and select the required template from the list of saved templates (the required template is highlighted). As a result, the parameters of the current report are updated according to the selected template.
The Recognized railway numbers report allows you to get data about the railway numbers recognized within a specified time period.
Note
To access the Recognized railway numbers report, you must activate it (see Configuring the Recognized railway numbers report).
The Recognized railway numbers report is a part of the LPR channel module. You must create and configure the corresponding object in Auto PSIM (see Setting up the LPR channel).
To create the Recognized railway numbers report:
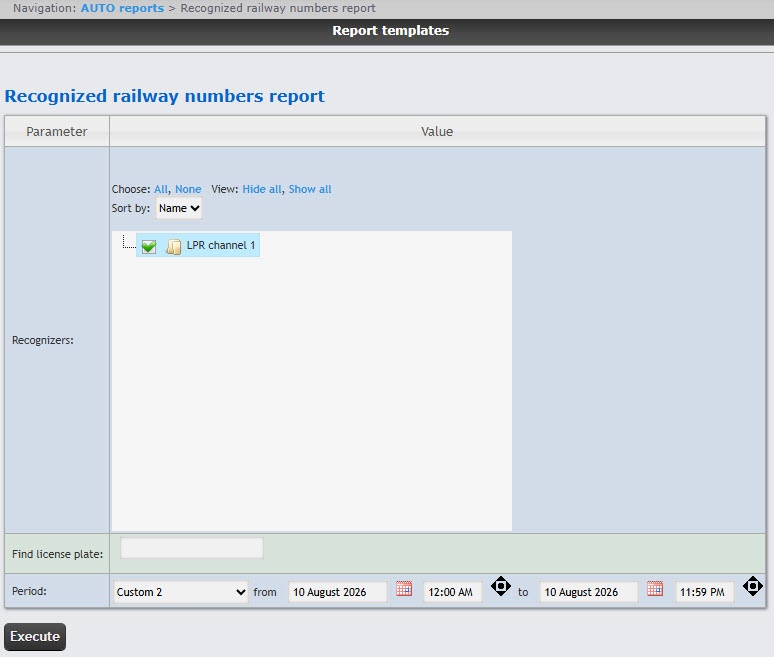
Click the Execute button to create the report.
Attention!
If the images and frames of the recognized railway license plates are stored in a folder on a disk, then to display the screenshots from the camera, it is necessary to configure the storage source for license plates and frames (see Configuring the storage source for Recognized number plates report and Recognized railway numbers report).
The report will contain railway license plates, the accuracy of license plate recognition, date, checksum check, recognizer, railway speed, and photos from the linked camera. When you click on a row in the table, a screenshot from the camera is displayed (in the lower right corner of the report) and, if there is access to the video archive, the video is played in the upper right corner of the report.
Note
Working with this table is described in Working with the Recognized number plates report and Recognized railway numbers report.
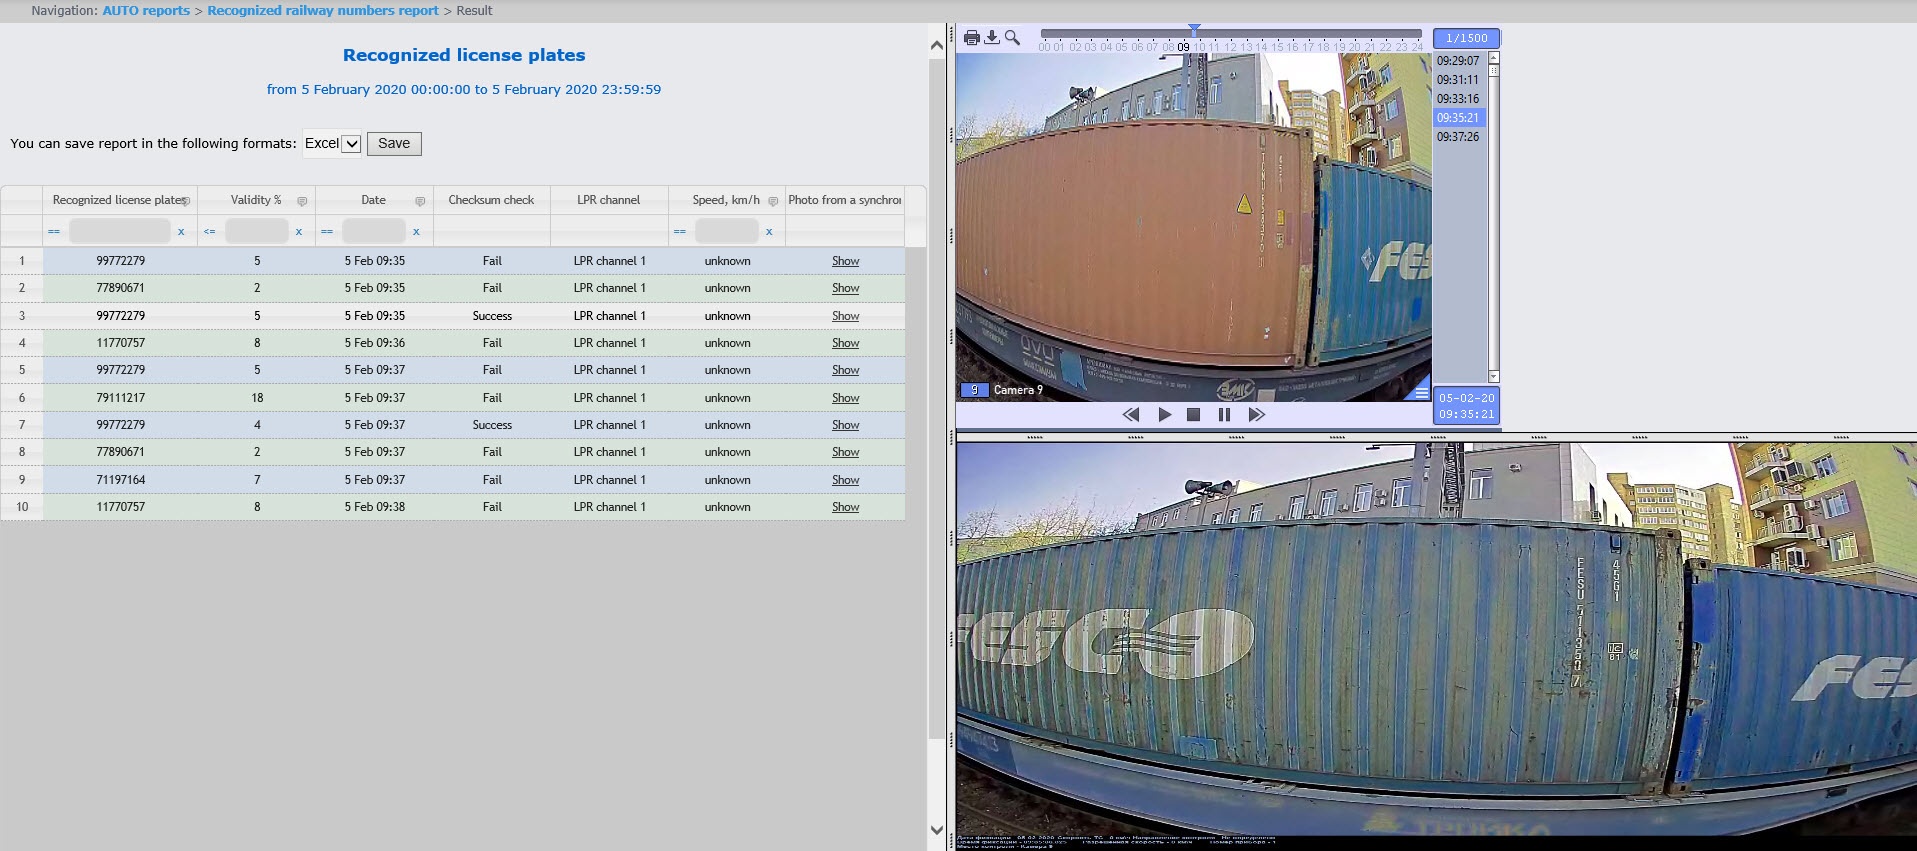
To save the report to a file, select the report format and click the Save button. You can save the report in the following formats:
Attention!
You cannot create this report automatically.
The Recognized railway numbers report is created.

