
Go to documentation repository
Previous page Next page
Note
You can use templates when you create a report.
To add a new template, click Report templates → New template and fill in the Name and Description fields. The template will use the selected parameters of the current report.
Templates work the same way as templates in the scheduler and can be used interchangeably.
When you create a response using a template, click Report templates at the top of the page and select the required template from the list of saved templates (the required template is highlighted). As a result, the parameters of the current report are updated according to the selected template.
To create a change protocol report, select the Change protocol report type (see Select the type of general report).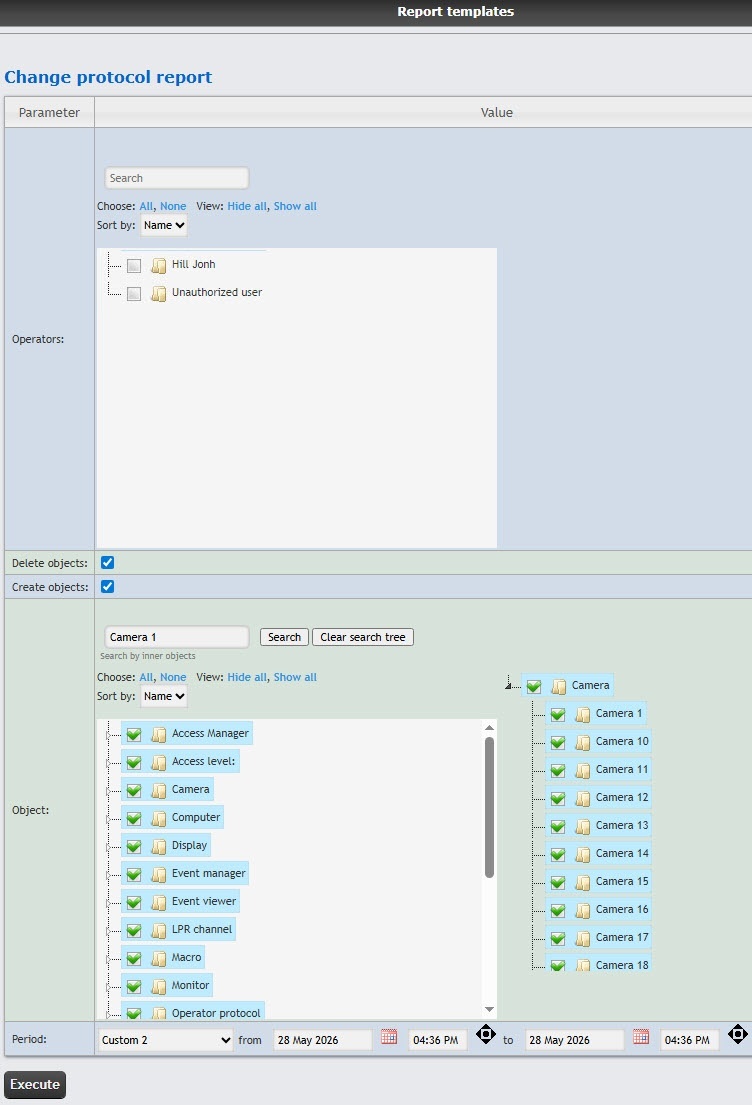
In the Operators field, set the checkboxes next to those users who have the rights to make changes. To select all users, click All, to deselect, click None. To expand the user structure, click Show all, to hide the user structure, click Hide all.
Note
The Unauthorized user value means a change of system by a user who wasn't authorized, or a user who was removed from the system, and/or a user who had their rights deleted.
In the Object field, set the checkboxes next to the objects whose changes you want to display in the report. To select all objects, click All, to deselect, click None. To expand the object structure, click Show all, to hide the object structure, click Hide all.
From the Period drop-down list, select the time period to create the report.
To create the report, click the Execute button.
Example of a change protocol report.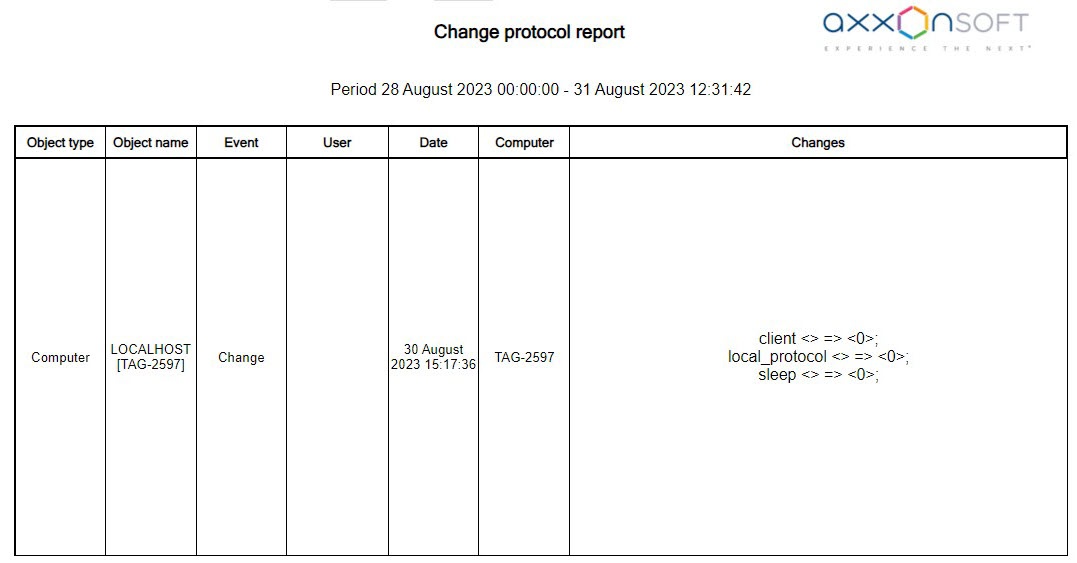
Note
The identifier of the object is indicated in square brackets at the end of the object name in the Object name field.
The identifier of the user is indicated in square brackets at the end of the user name in the User field.
In the created report, the objects are sorted by their identifiers and by the event date.
All permanent access levels are displayed even if no changes have been made to them if the Show permanent access levels toggle is turned on in the settings of general reports (see The Settings tab of the general reports).
All access levels are displayed if the Show all access levels toggle is turned on in the settings of general reports (see The Settings tab of the general reports).
The change protocol report is created.

