Documentation for WEB Report System PSIM 2.0.

Previous page Next page

Note

You can use templates when you create a report.

To add a new template, click Report templates  New template and fill in the Name and Description fields. The template will use the selected parameters of the current report.

Templates work the same way as templates in the scheduler and can be used interchangeably.

When you create a response using a template, click Report templates at the top of the page and select the required template from the list of saved templates (the required template is highlighted). As a result, the parameters of the current report are updated according to the selected template.

The Report by users' access levels and readers is a table that contains the information about users with the selected access levels or selected readers assigned to them.

To create the Report by users' access levels and readers:
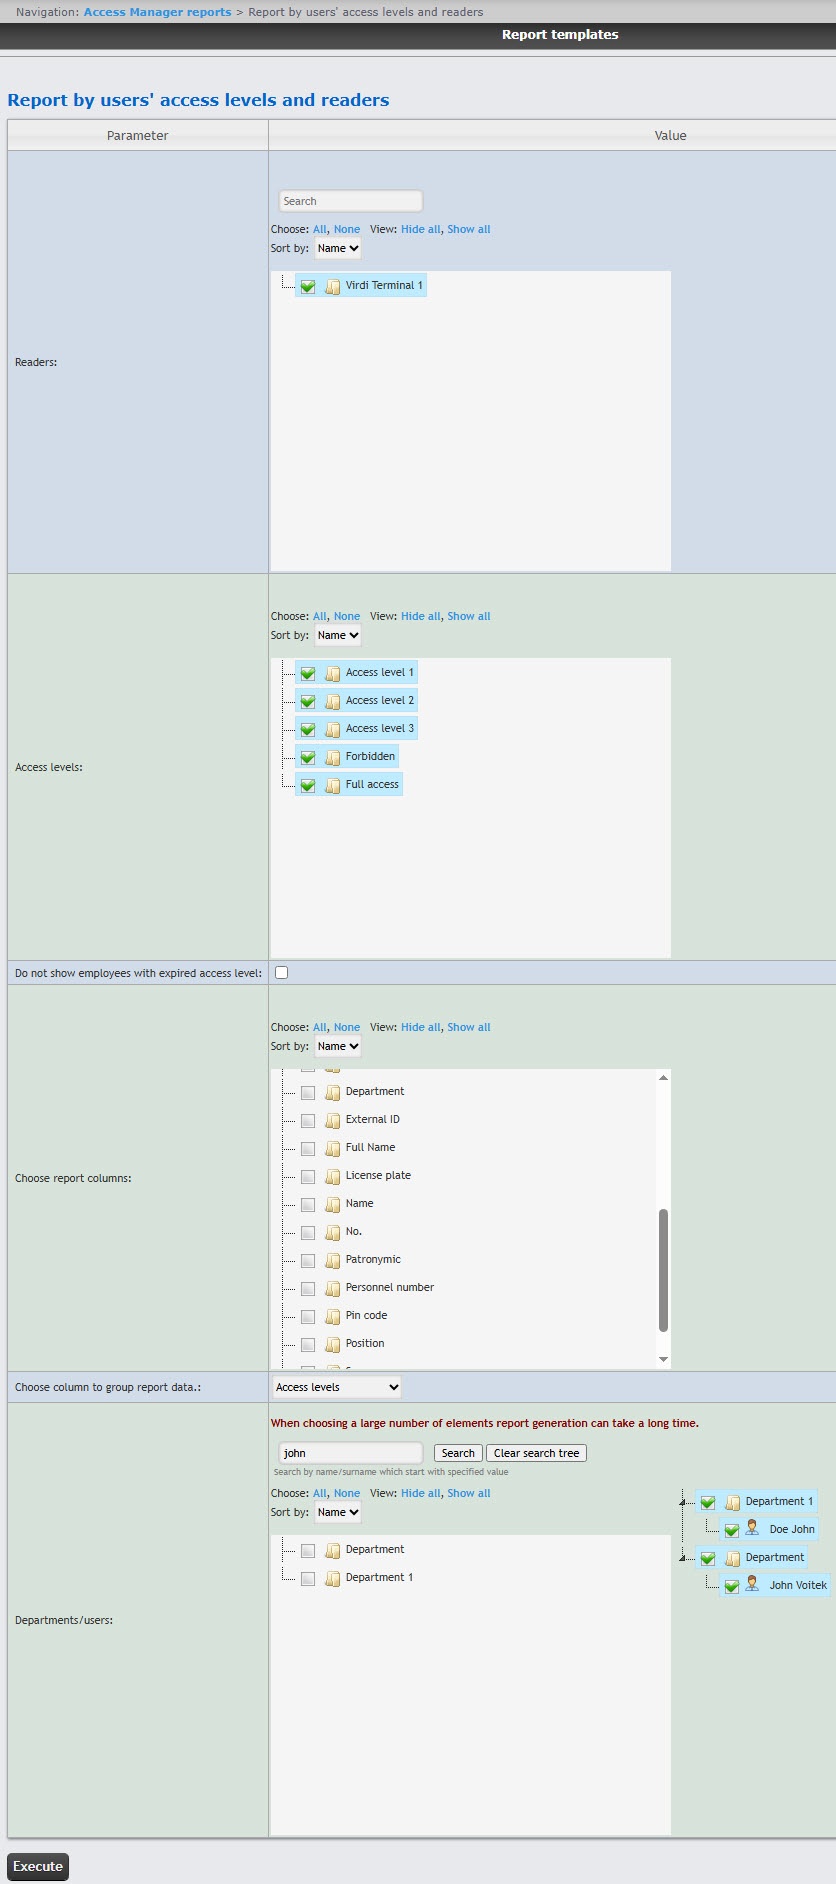
  1. Select the Report by users' access levels and readers (see Select the type of Access Manager report).
  2. In the Readers field, set the checkboxes next to those readers whose information you want to include in the report. Click All to select all found readers, click None to deselect. Click Show all to expand the reader structure, click Hide all to hide the structure. 
  3. You can search for the reader using the search field. For this, in the search field, enter the name of the reader. The search works from the first character. The results фку highlighted in a different color. 
  4. By default, the list of readers is sorted by name. To sort by number, select this option from the Sort by drop-down list.

    Attention!

    This field displays only those access points that are added to any access level in the Access Manager module (see Creating access levels).

    For the rs user, it is sufficient to create an access level with all access points. For other users, you must assign access levels in the Access Manager module (see Assigning access levels to a user).


  5. In the Access levels field, set the checkboxes next to those access levels whose information you want to include in the report. Click All to select all found/available access levels, click None to deselect. Click Show all to expand the access level structure, click Hide all to hide the structure.
  6. By default, the list of access levels is sorted by name. To sort by number, select this option from the Sort by drop-down list.
  7. Set the Do not show employees with expired access level checkbox to display only valid access levels and employees who have them in the report. If the checkbox is clear, the report displays all employee access levels, including expired (temporary) ones.
  8. In the Choose report columns field, set the checkboxes next to those columns that must be displayed in the report. You can also change the order of the columns: left-click and hold the column name and drag it higher or lower relative to other columns. Click All to select all found/available columns, click None to deselect. Click Show all to expand the column structure, click Hide all to hide the structure. 

    Note

    You can select up to 5 columns.
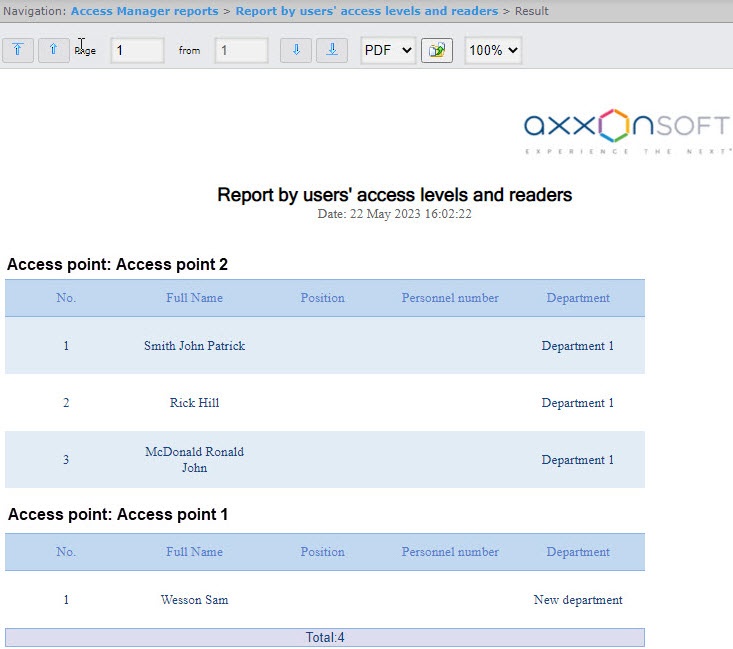
  9. From the Choose column to group report data drop-down list, select the required column to group the report data: Access levels, Access point, Department, Company/Department.
  10. In the Departments/users field, set the checkboxes next to those departments or employees the information on which must be displayed in the report. Click All to select all found/available departments/employees, click None to deselect. Click Show all to expand the department/employee structure, click Hide all to hide the structure.
  11. You can find an employee by name or surname using the search. To do it, enter at least four first characters of the employee's first name or surname in the search field and click the Search button. The department to which the found employee belongs will be displayed in the additional object tree to the right. To clear the search field and the search tree, click the Clear search tree button.
  12. By default, the list of departments and employees is sorted by name. To sort by number, select this option from the Sort by drop-down list.
  13. To create the report, click the Execute button.
    As a result, the report with the specified parameters is displayed.
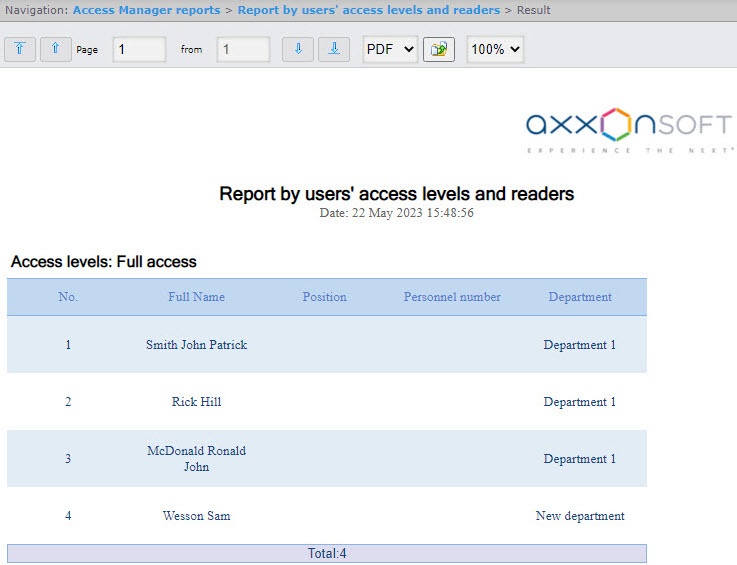
    Example of a report with data grouped by the Access levels column.

    Example of a report with data grouped by the Access point column.

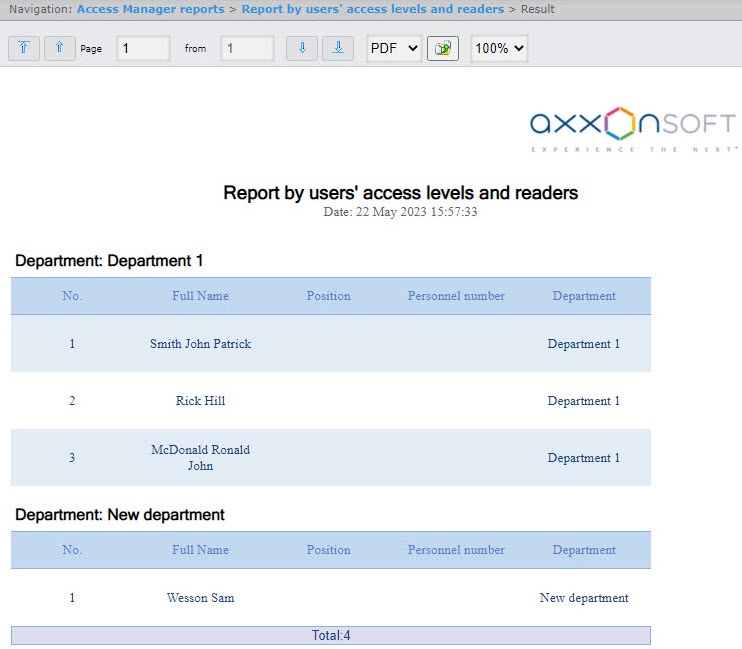
    Example of a report with data grouped by the Department column.

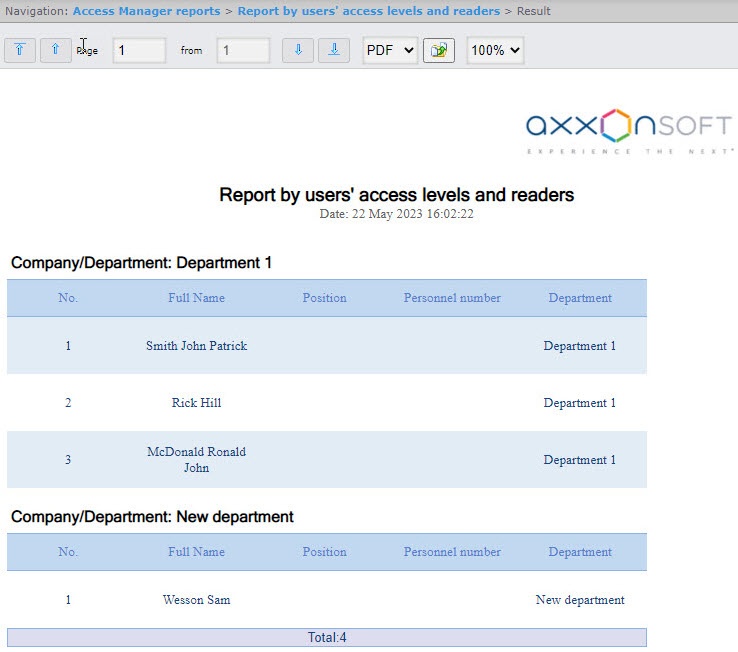
    Example of a report with data grouped by the Company/Department column.

    All possible report fields are described in the table.
Field nameDescription
No.Line number
Full NameEmployee's full name
NameEmployee's first name
SurnameEmployee's last name
PatronymicEmployee's patronymic 
Position Employee's position
External IDEmployee's external ID
Personnel numberEmployee's personnel number
License plateLicense plate of the employee's car
CarBrand of the employee's car
Card numberNumber of the employee's access card
Card codeCode of the employee's access card
Date of card issueDate when the card was issued to the employee
Access pointAccess point through which the employee passed
Access levelsEmployee's access level
Company/DepartmentCompany/Department where employee works
PhoneEmployee's phone number
CompanyThe name of the parent department, if the employee's department is a subsidiary
CommentComment
Card start dateStart date of the employee's card
Card expiration dateExpiration date of the employee's card 
Pin codePIN code of the employee's card

You can save the report in the following formats:

  • PDF
  • Excel
  • CSV.

The Report by users' access levels and readers is created.