
Go to documentation repository
This section shows how to add information on the DEMO_SERVICE object to psim.ddi by using the ddi.exe tool.
To add information on the DEMO_DEVICE object, do the following:
- Open psim.ddi file in one of the following ways:
- Go to the Axxon PSIM\Tools folder and run ddi.exe.
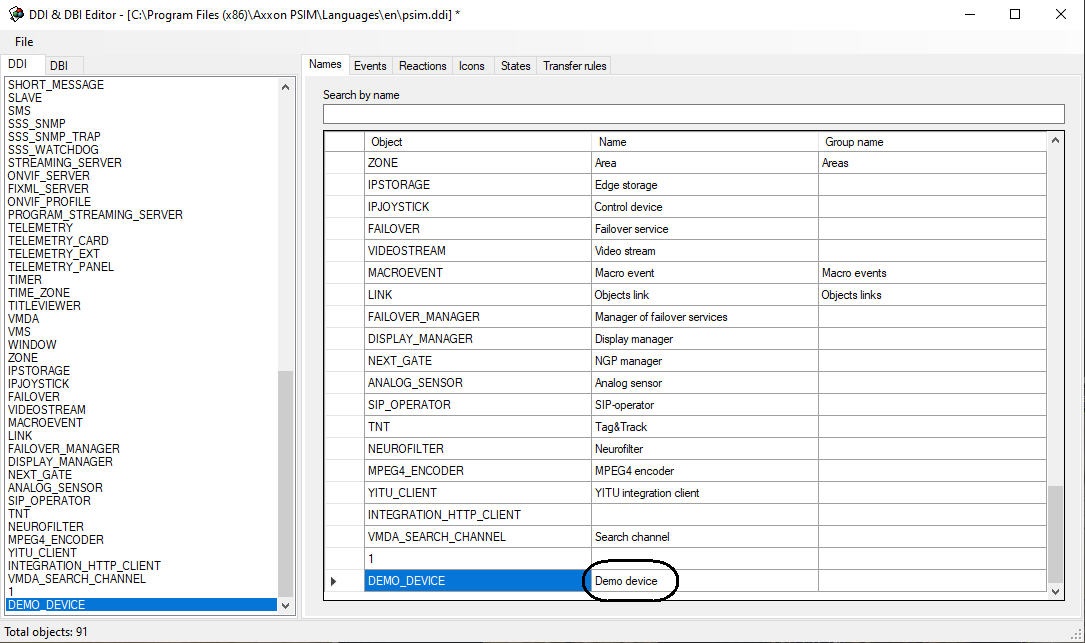
- In the program window, select the DDI tab.
- In the File menu, select Open. The Open dialog box appears.
- Go to the Axxon PSIM\Languages\en folder and select psim.ddi. The window of ddi.exe shows a list of objects.
- Open the Axxon PSIM\Tools folder in Windows Explorer or any other file manager, then double-click the psim.ddi file.
- Go to the Axxon PSIM\Tools folder and run ddi.exe.
- Add the object by selecting Add in the list's context menu or by pressing the Insert key.
A dialog box opens. In the ID field, enter an object name (used for identification) and click OK.

The DEMO_DEVICE object is now shown in the list of objects.
In the Names tab, enter an object name.
- In the relevant tabs, add information on the DEMO_DEVICE object.
- In the Events tab, add the ON and OFF events.

- In the Reactions tab, add the ON and OFF actions.

- In the Icons tab, enter a BMP file name (the part that serves as an image ID). Image IDs allow you to use multiple BMP files to show objects of the same type on the Map.

In the States tab, add the ON and OFF states. To show an object state on the Map, enter a BMP file name (the part that serves as an ID of the state).

Note.
The names of the BMP files in the Axxon PSIM\Bmp folder must have the following format:
<Image ID>_<State ID>
If an image ID is not set, the BMP file name must be the following:
<Object ID>_<State ID>Note.
The Map may show objects using lines (that is, without using BMP files). In this case, when an object changes its state, the line color changes. For a state, the color (RGB) is set as follows:
<State>$R:G:BIn the Transition Rules tab, set a rule for transitioning from one state to another after a certain event.

Note.
If the Transition from state field is left blank, the rule will apply to all starting states.
- In the Events tab, add the ON and OFF events.
- To save changes, in the File menu, select Save.
The information on the DEMO_DEVICE object is now added.
Note:
The fields of the ddi.exe tables are described in detail in APPENDIX 1. DDI file structure.
Attention!
After making changes to the DDI file, you must update the database structure by using idb.exe (see Steps 4–7 in Section Adding Objects to psim.dbi).
Overview
Content Tools