Go to documentation repository
Documentation for DetectorPack PSIM 1.0.1.
Previous page Next page
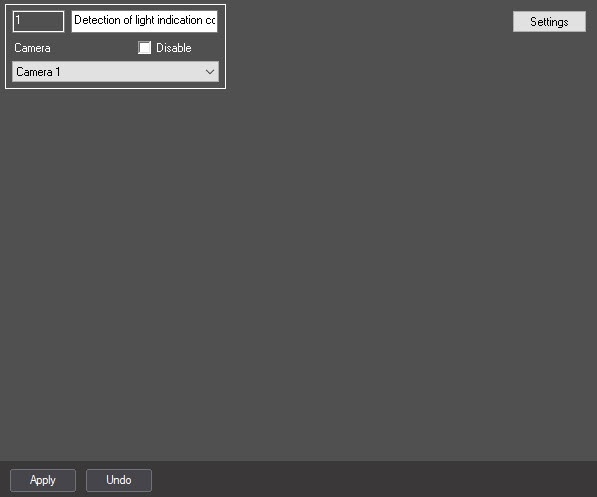
The Detection of light indication control module is configured using the System settings menu, on the Hardware tab, on the Detection of light indication control settings panel, using the Camera settings.
The Detection of light indication control module is configured as follows:
- Go to the Detection of light indication control settings panel.
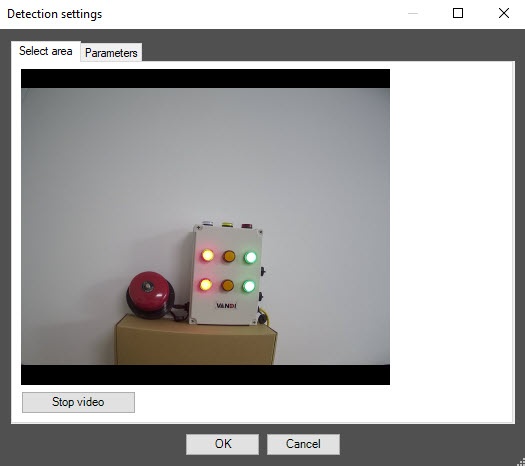
- Click the Settings button (1). The Detection settings window will open.
- Specify the location of lights sources in the image which should be tracked by detection:
- Click the Stop video button to capture the video image.
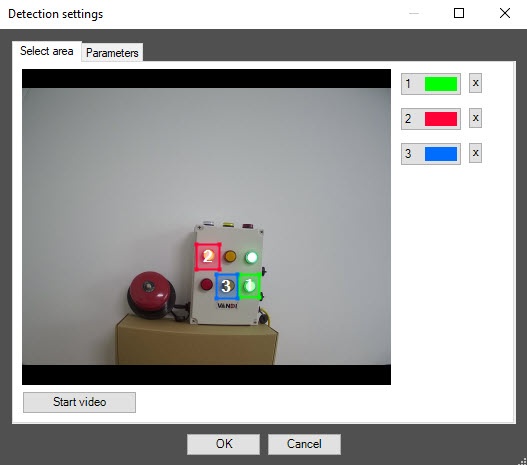
- On the captured video image, specify areas to be analyzes (1). Click the left mouse button in the frame area and stretch it to the required size. The minimal allowed size of the analyzed area is 15x15 pixels. The maximum allowed size of the analyzed area is 200x200 pixels.
Areas of interest are numbered in the order of creation starting from 1. The number of analyzed area is not limited. Adding the area at the right from the video image the corresponding button is displayed (2). - Specify the required size, shape and location of sectors in the area of interest moving their borders. Selecting the area take into account that the local change of illuminance and specular surface near lamps in the area of interest can cause the false detection triggering.
- To specify the area again, click the button with its number in the list of areas and mark the area in the video image frame (2).
- Click the button next to the Area of interest button.
- Specify the detection sensitivity:
- Go to the Parameters tab in the Detection settings window (1).
- Using the up-down buttons, enter the value of sensitivity parameter in the Sensitivity field (2). The optimal value is selected experimentally by testing detection on triggering in the required conditions. The value range is from 0 to 100. The more sensitivity the more possibility of false triggering. The less sensitivity, the more possibility of losing event.
- Go to the Parameters tab in the Detection settings window (1).
- Click the OK button (3) to save the changes and return to the settings panel of the Detection of light indication control.
- On the Detection of light indication control settings panel, click the Apply button (2).
Configuring the Detection of light indication control module is complete.
Overview
Content Tools


