
Go to documentation repository
Documentation for Axxon One 3.0/3.1 version. Documentation for Axxon One 2.0 version is also available.

General information
This action starts the export of a frame or video.
Configure the action
To configure the action, do the following:
- Go to the Programming tab.
- In the Event rules or Cycle rules list, click Create... (see Configuration of macros).
- Select a start condition that triggers a macro (see Configuration of start conditions).
- Click the
 button below the start conditions.
 - From the drop-down list, select Camera: Start export.
- In the Export agent parameter, select a server to which you want to export a video (see Configuration of the export agent).
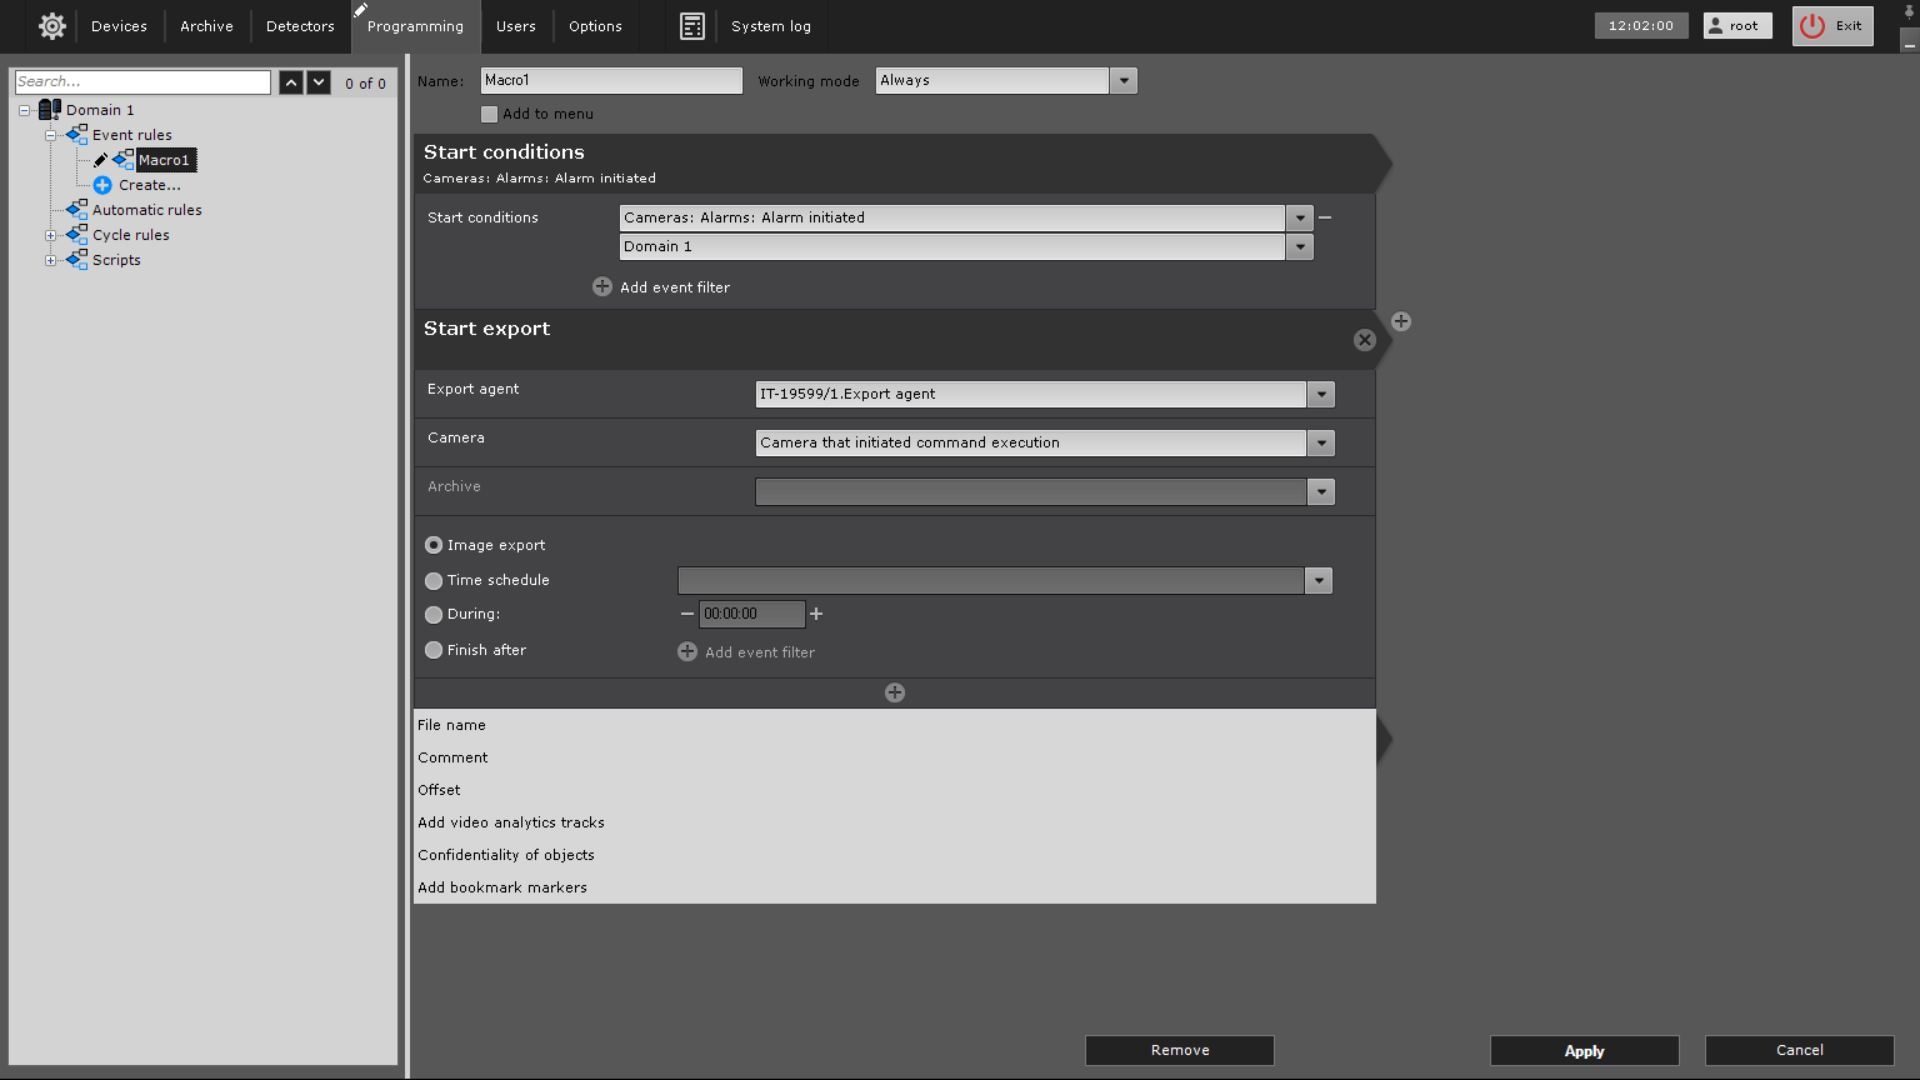
- In the Camera parameter, select a camera, the video from which you want to export. In addition, an implicit camera selection is allowed—Camera that initiated command execution (see Configuration of start conditions).
Attention!
If a macro is initiated by an event from an input or output (see Configuration of start conditions) that is not connected to any camera, you need to select a specific camera for this action. If you select a group of cameras or a camera that initiated the macro, the action doesn't start.
- In the Archive parameter, select an archive, the video from which you want to export.
Attention!
When you select more than one camera in a macro, the Archive field is unavailable.
In the parameter group, specify the export interval:
Option
Description
Image export
Exports a frame corresponding to the time when the action was started.
Attention!
The image cannot be exported if the camera doesn't have an archive
Time schedule
You must select a time schedule.
Exports images from within the time schedule. Interval of the exported video—[beginning of the specified time schedule; end of the specified time schedule].
Attention!
If you don't specify the offset (see step 10c), the intervals from the time schedule are taken over the last 24 hours
During
You must set the export duration in HH:MM:SS. The starting point of the exported video is the action start. The endpoint is determined on the basis of the specified duration (interval [action start; action start + duration])
Finish after
You must select one or more events, after receiving which (any of them), export is stopped. The starting point of the exported video is the action start; the end point is the moment of receiving any of these events
If necessary, you can click the
 button and add additional parameters:
File name
Name of the exported file
Comment
The comment is superimposed as captions over the exported video
Offset
The time by which the start of the exported video is shifted back. If you set this parameter, the time interval of the exported video is as follows: [action start − (duration + offset); action start − offset].
If export is performed within a time schedule, this parameter is used to determine the period in the past before the action started for which the export must be performed. For example, if you set the offset to 48 hours, all videos from the given time schedule recorded within 48 hours before the action starts are exportedAdd video analytics tracks
If you want to view the tracks of objects detected by the detector, select the detector from the drop-down list
Attention!
When you select more than one camera in a macro, the Add video analytics tracks field is unavailable.
Confidentiality of objects
Select the required value from the drop-down list:
- Do not hide—if you don't want to hide the masked area in the exported video or frame.
- Hide—if you want to mask objects in the exported video or frame.
- Invert and hide—if you want to mask the area around objects.
Add bookmark markers
If you want to view the selected area on the exported frame, set the checkbox. By default, the checkbox is clear
Attention!
You can use the following templates for file names and text comments (see Text templates in the action settings):
- %startTime% , or [START_TIME], or {startTime}—start time of exported interval.
- %finishTime% , or [FINISH_TIME], or {finishTime}—end time of exported interval.
You can use the following templates for macros started by a text message from an event source (see Configuration of start conditions):
- %startEvent%, or [START_EVENT], or {startEvent}—event that initiated the export start.
- %finishEvent% , or [FINISH_EVENT], or {finishEvent}—event that stopped the export.
- Click the Apply
 button.
Configuration of the Start export macro is complete.
Overview
Content Tools