
Go to documentation repository
On the page:
Operation principle of Logic
The Logic of event handling is a sequence of actions that must be performed by an operator when processing an event in the Incident manager.
Six elements are used to perform actions:
- Image. The operator can add a frame from a camera or an arbitrary image to the report. Images from maps or cameras can be added automatically.
- Button. The button can be used to close the event handling interface and/or to open a report.
- Combobox. The operator can select values from one or several lists.
- Comment. The operator can add a comment while handling an event.
- Radio button. The operator can choose one of the suggested values.
- Checkbox. The operator can set one or more checkboxes.
The number of elements that can be used in the Logic and the number of actions that the operator must perform are not limited. After the operator performed any action, the next action that must be performed is specified in the element settings; a macro can be executed as well, if necessary. The sequence of actions can be determined by the operator's actions in the previous steps.
If there are several Logics, you must create and configure each Logic separately.
Creating a Logic
To create a Logic, go to the settings panel of the Incident handler object, select the Logic tab and create a Logic in one of the following ways:
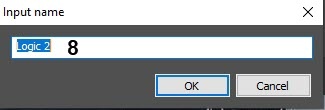
- create a new Logic: click the + button (2) and in the window that opens, enter the name for the new logic (8).
- create a copy of an existing logic: select the logic in the list (4) and click Create copy (1). The name of the new logic consists of the name of the original logic and the copy number in brackets. For example, for Logic 1, the first copy will be named Logic 1(1), the second copy will be named Logic 1(2).

As a result, the new logic appears in the list (4).
Configuring a Logic
For the Logic to work, you must add elements to it and configure each of them, as well as set the order in which elements are displayed for the operator:
- In the list of Logics (4), select the Logic you want to configure.
- Add the required number of elements to the Logic (5). To add a row to the table, select the last row and press the ↓ key on the keyboard. To delete rows from the table, use the Ctrl + Del key combination.
- In the Element ID column, enter the name of each element.
- In the Multitasking column, set the ability to switch to processing other events when one event is processed while on the selected Logic element:
Select Deny, so that when this element appears, the operator cannot switch to processing another event until the operator moves to the element with the Allow value or completes processing the event (default);
Select Allow, so that when this element appears, the operator can proceed to processing another event.
Select the element that will be displayed first for the operator when processing the event. To do this:
- Select an element in the table.
- Click the Edit button (6).
- In the Starting element drop-down list, select Yes.
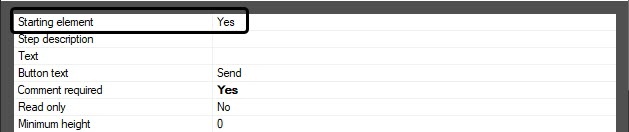
Click the OK button.
As a result, a check mark will be displayed next to the selected element in the Starting column of the element table.Note
If the starting element is not selected, then it will be the first element in the list.
- Configure each element of the Logic and their cooperation (see Configuring the elements).
- Click the Apply button (7).
Configuring a Logic is complete.
Resetting the logic for processed events
If the administrator has created an incorrect or incomplete Logic and wants to edit it, it is possible to reset the event processing jobs with this Logic for operators so that the updated Logic is applied to the event. To do this, after you edit the Logic, set the Apply to processed events check box and click Apply:

As a result, the current event processing jobs with this Logic will be reset for operators and event processing can be started over with the updated Logic.
Example case: the administrator has created a two-step Logic, in which the second step is a Button without the Finish parameter set and with Multitasking disabled for this Button (see Configuring the button). It is impossible to complete event processing with such Logic. In this case, the administrator can edit the Logic by enabling Multitasking for the Button, then set the Apply to processed events check box and click Apply. As a result, the events processed with this Logic will be reset to the Waiting for handling status and the operators will be able to restart the event processing with the updated Logic (see Events control and processing using the Incident manager).
Removing a Logic
To remove a Logic, select it in the list of Logics (4) and click the - button (3). In the window that opens, confirm the removal:

Note
The Logic of event handling is applied to an event at the moment when the event gets into the Incident handler and is displayed in the Incident manager. Accordingly, if you change the Logic, the updated Logic will be applied to the events that occurred after it was changed. If a group processing of the events is enabled, the updated Logic will be applied to a new group of the events after the existing group is closed.
Overview
Content Tools