Go to documentation repository
The Change parameter function is used to group edit the parameter values of Axxon PSIM objects in the database. To use this function, you should know the Axxon PSIM database structure. This function isn't recommended to be used by beginning users.
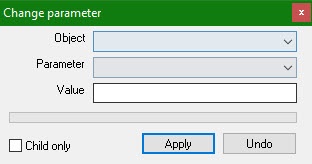
When you select the Change parameter function in the context menu of the system object, the Change parameter dialog box will open.
From the Object drop-down list, select the type of the system objects, the parameter of which should be edited. This list contains only the objects that are the child objects to the object whose context menu was used to display the dialog box. To edit the parameters of the Computer object, select the Change parameter item in the context menu that opens when you right-click the area with no objects of Axxon PSIM objects tree.
From the Parameter drop-down list, select the name of the object parameter that should be changed in the Axxon PSIM database.
Attention!
The parameter will be changed for all objects of the selected type in the distributed configuration.
In the Value field, specify a new value of the parameter in the format in which it will be saved in the database. You can find out the data type of the parameter using the ddi.exe utility (see Editing psim.dbi and psim.ext.dbi database templates using the ddi.exe utility). You can find out the format of the parameter when viewing the Axxon PSIM database (see Viewing Axxon PSIM database).
If you need to edit the parameter only of the child objects relative to the object selected in the tree, set the Child only checkbox. For example, this checkbox allows editing the parameter only on the computer selected in the tree.
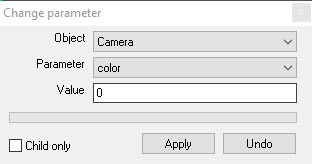
Example. All cameras in the system should display a black-and-white video image.
For this, do the following:
- Open the Change parameter dialog box from the context menu of the Video capture device or Camera object.
- Fill in the fileds in the Change parameter dialog box as shown in the figure.
- Click the Apply button.

